Category Archive: “Uncategorized”
Bill Atkinson
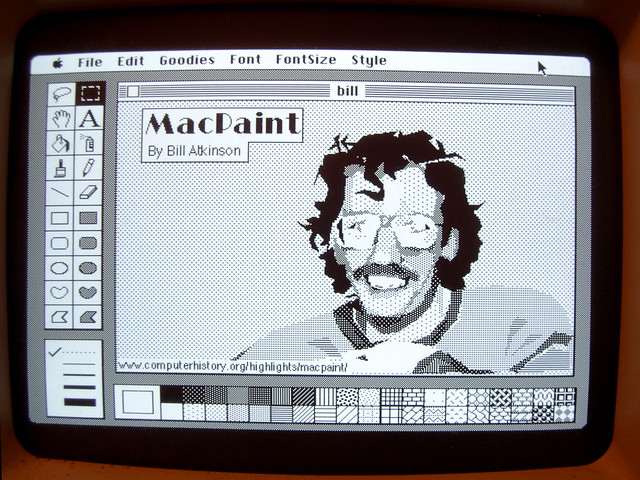
Here’s what I wrote on Flickr to explain this picture:
The source code for MacPaint and the QuickDraw graphics library is now available, as is their story, at the Computer History Museum. To celebrate this news, and to illustrate that great tools retain their utility even as they age, I used MacPaint to paint a portrait of MacPaint programmer Bill Atkinson.
Gruber posted a link to this image yesterday. It’s been viewed over 20000 times in the day since.
Check out Bill’s website for his photography and iOS PhotoCard app.
Prompted by some of the comments on Flickr, I posted some other nostalgic Mac Plus software pictures.
Posted on Friday, July 23rd, 2010. Tags: art, mac.
Making Paper
I recently got it in my head that it would be fun to make my own paper. Well, last night I put some torn scrap paper and shredded bills in a tub of water to soak overnight. Today I set about turning that sloppy mess into ragged new sheets of paper.
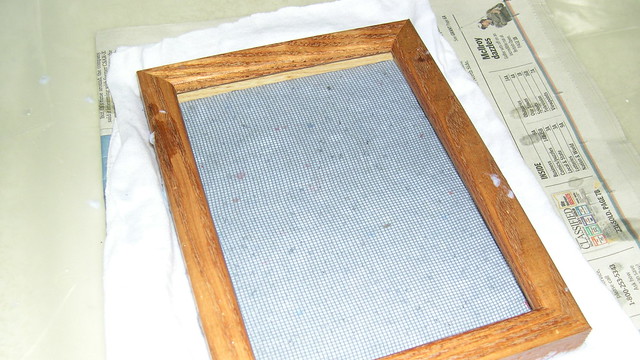
Today’s first step was a trip to the hardware store to buy some mesh screen for the mold. I used a small picture frame as the frame for the mold. Once that was ready, I set about pulping the paper. A lot of contemporary do-it-yourself guides suggest using a blender, but I don’t have a blender, so I started with a fork and a whisk. I soon determined that using my hands was more enjoyable and just as effective. That’s what she said.
Anyway, here are some photos from the rest of my first day of papermaking. Check out the full set of photos on Flickr for a few more pictures and additional comments on each step.
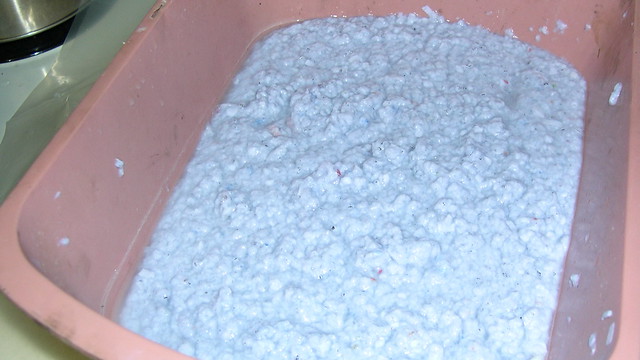
A bin full of pulp, hand-wrung to the consistency of oatmeal:
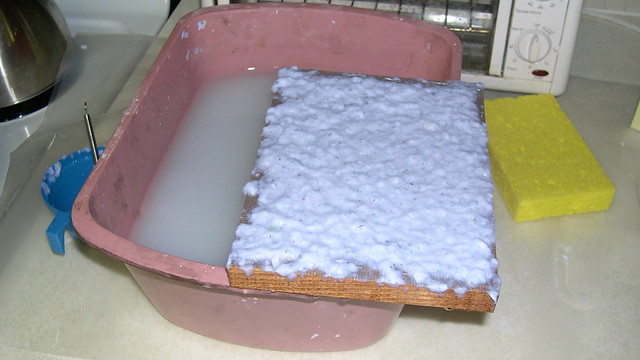
The mold, just withdrawn to drain from the solution of pulp:
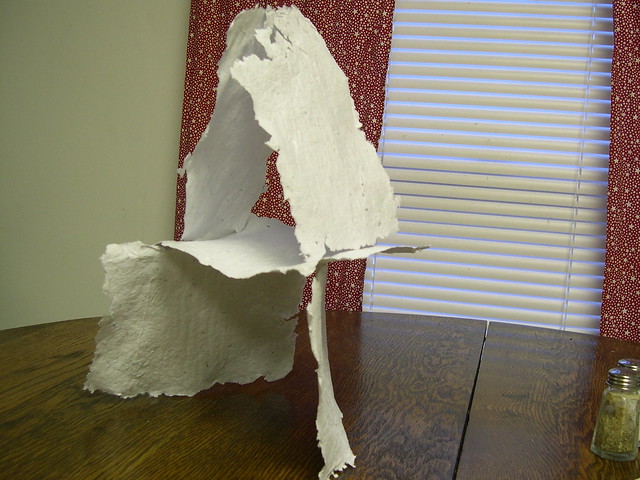
Frame flipped over to deposit the protopaper onto my pile of newspaper and old T-shirts:
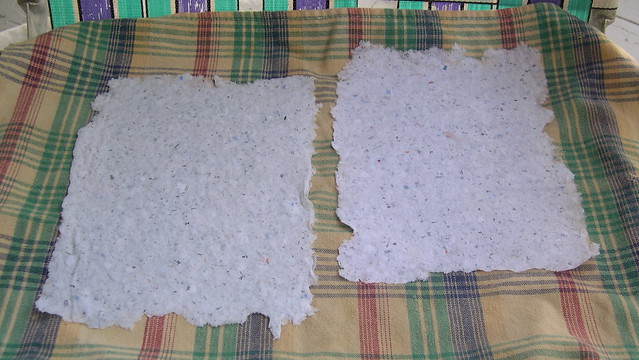
My first two sheets of paper, proudly set out to dry on the back porch like cookies cooling on the windowsill:
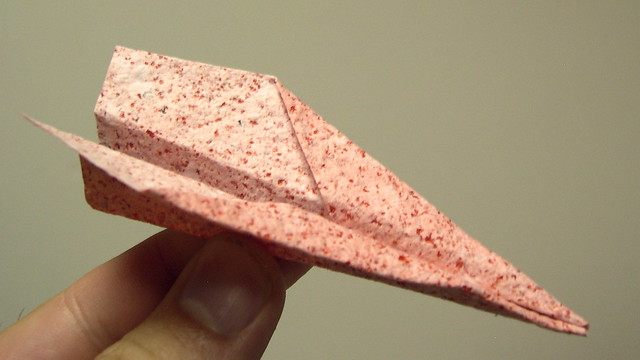
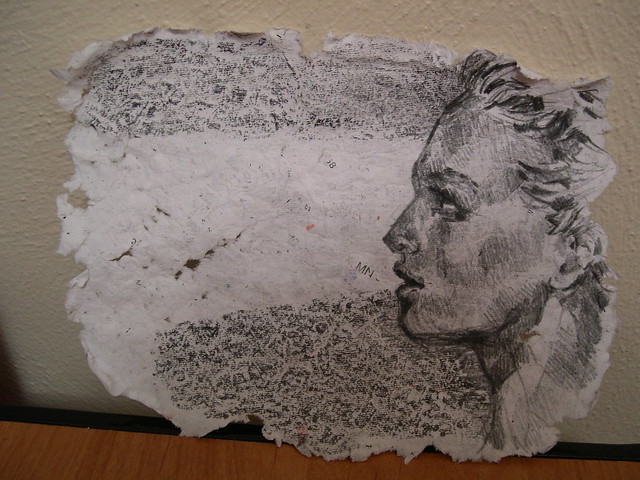
One of the many possible uses for homemade sheets of paper (note that although it appears bluish-gray when damp, this batch actually becomes pretty white as it dries):
The verdict is in: this paper is profile-portraits-of-pretty-girls-compatible! The bits of printed text that survive the pulping process add a bit of mystery to the drawing. Why is she whispering about Minnesota?
Well, this has been great fun. I look forward to more experiments with papermaking. Lots of variables to play with in the recipe, the equipment, and the process.
Instructions consulted but only loosely obeyed:
- Making Paper at KidsGardening.com
- How to Make Paper at Pioneer Thinking
- Making Paper at Home at Fun Science Gallery
- How to Make Paper, an illustrated tutorial by Brenna Zedan
Posted on Saturday, July 17th, 2010. Tags: art, drawing, paper.
Some of My Favorite Bike Blogs
I like bikes. Here are some of my favorite bike-related blogs:
EcoVelo
Reviews of swank transportation-oriented bikes and accessories, as well as discussion of issues related to practical cycling. Lots of sidebar links to interesting bike blogs and vendors. My favorite part of EvoVelo, though, has got to be the beautiful photography.
As described by Alan and Michael, the authors:
This site is the public expression of our personal commitment to reduce our impact on the environment by employing bicycles as our primary mode of transport. By sharing what we learn from this endeavor, while also providing an aesthetically pleasing experience that celebrates the beauty of the bicycle and the joys of everyday bike riding, we hope to inspire others to make a similar commitment.
Related: Bike Commuters
Lovely Bicycle
I operate my hooptie utility bike with little regard for aesthetic considerations, so it’s an eye-opener to see just how classy the bicycle scene can be.
Related: Copenhagen Cycle Chic and Vélocouture both feature photos of stylish bikes and riders, but without the personal narrative that makes sites like Lovely Bicycle interesting to revisit.
Urban Simplicity
Joe George rides a Yuba Mundo cargo bike around Buffalo, NY. I enjoy his things that can be carried on a bike series, no doubt because I like to carry things on my bike, too. His cooking posts are simply delicious.
Related: the I carried this on my bicycle Flickr group
The Path Less Pedaled
Russ and Laura sold everything and set out on their bikes to seek their fortune and meet America:
Paring down their lives to just what will fit on two bicycles, Laura and Russ embarked on an extended bike tour throughout the US and beyond – with the goal of connecting with and collecting the stories of people who followed a calling to live their lives in unique ways, while revitalizing the model of the traveling artisan and inspiring others to travel by bicycle.
Pretty inspiring.
Related: Brown Girl in the Lane, the bike-riding life as reported by a San Diego transplant
Bike Snob NYC

The inimitable Bike Snob lovingly lampoons every sector of bike culture, from the professional racer to the fixed-gear hipster to the car-free cargo biker:
While I love cycling and embrace it in all its forms, I’m also extremely critical. So I present to you my venting for your amusement and betterment. No offense meant to the critiqued. Always keep riding!
There are lots of running jokes in Bike Snob’s blog, so it may take a few visits to the archives before you’re fully able to parse the barrage of puns and references. Be sure to tune in for the weekly Friday Fun Quiz!
Related: Rantwick, commuter communiqués from London, Ontario
Posted on Tuesday, July 6th, 2010. Tags: bike.
Screenshots of Selected TKLib Examples
Tcllib (the Tcl Standard Library) includes a number of user interface components, known collectively as TKLib. The documentation is good, but includes no illustrations or screenshots. Here are images of how a few of the visually interesting examples appear on Mac OS X 10.6.4 with Tcl/Tk 8.5.7.
Ctext
Ctext is an enhanced text widget with support for syntax highlighting and other features. Here’s the example (it displays its own main procedure code):

Plotchart
Plotchart is a package for creating charts and graphs. Here’s the xy plot from the description:

Here is the bar chart from the resizing example:

Swaplist
Swaplist provides a canned dialog for exchanging items between two lists. Here’s the example:

Posted on Wednesday, June 30th, 2010. Tags: code, tcl.
Adjustable Stem
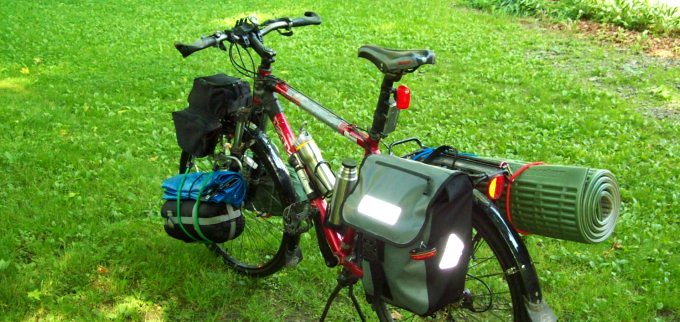
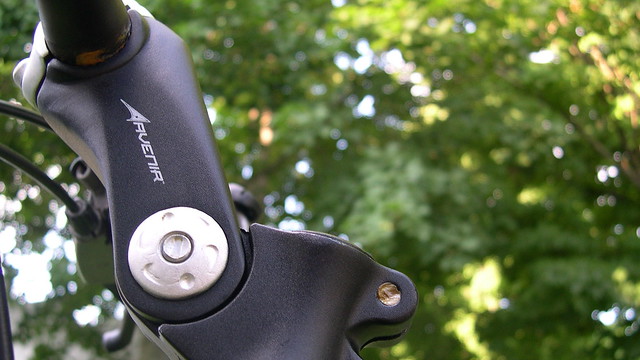
As reported earlier, here’s what my new adjustable stem looks like:
Do not be fooled into thinking the rest of my bike looks so clean and factory-fresh.
The stock stem elevated the handlebars about 10 degrees above perpendicular to the steerer tube. This stem is the same length, but it can be adjusted to provide elevation up to 50 degrees above perpendicular, as shown here. Although this doesn’t move the handlebars a great distance, it does move them up and aft far enough to take a noticeable amount of weight off my arms. I’ve found discomfort from the forward posture to be the limiting factor in my ability to enjoy longer rides (20 miles or more). If I’ve planned my modifications correctly, this stem will facilitate a slightly more upright but much more sustainable posture.
Initial tests around the neighborhood indicate it rides well indeed. One minor change in geometry almost makes the bike feel like a cruiser, without sacrificing any advantages.
Posted on Friday, June 25th, 2010. Tags: bike.
McReadability and Preformatted Text
Made a very minor addition to the McReadability stylesheet. Preformatted text blocks are now scrollable. Previously, they would appear truncated to the column width. <pre> text is usually used to present example code; as the tag name suggests, the contents should not be reformatted.
Posted on Friday, June 25th, 2010. Tags: code, readability.
MacBook Fan
Machine’s fan has occasionally been emitting some unpleasant noises. Fearing a dust buildup that could lead to overheating problems, I took apart the computer and did my best to dislodge and disperse the dust. So far, so good – I don’t think I’d realized how hot and noisy it’d become, because it seems quite cool and quiet now. (Well, relatively speaking; it wouldn’t be a MacBook if you couldn’t flip it over and fry an egg on the bottom.)
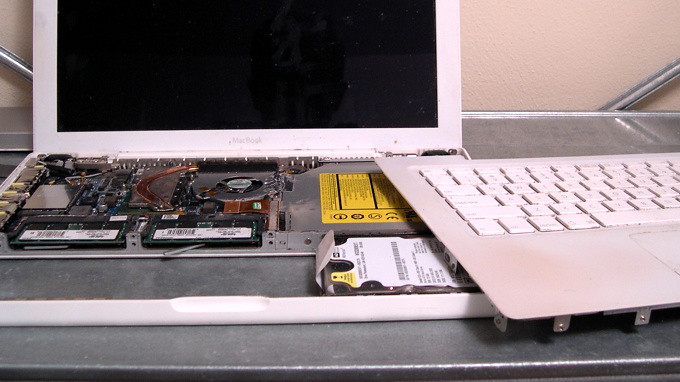
Thanks to iFixIt for the excellent step by step disassembly guide. Without it, I’d probably have removed many screws I didn’t have to remove.
Posted on Thursday, June 24th, 2010. Tags: hardware, mac, macbook.
Haiku Reviews of Selected Stories from Fragile Things, a Compendium of Short Fiction by Neil Gaiman
Here’s my take on a few of the tales from Fragile Things: Short Fictions and Wonders. As always, let’s not be too pedantic about what constitutes a haiku or a review.
The boy ran away
and found a friend with whom to play
and maybe stay.
In high school, some of our cross country routes took us through a cemetery. Some folks said it wasn’t an appropriate place to run, but I always figured the residents wouldn’t mind the company.
Who is the demon
who resurrects your regrets?
Feelings, flayed, expire.
Gaiman’s comments on this compact parable introduced me to the “Möbius story” label for cyclical stories. This is the first of two or three summarized here.
The Facts in the Case of the Departure of Miss Finch
Evening on the town:
at the circus, underground,
kingdoms, lost, are found.
While they were in the fifth room, the prim biologist said she wished the Smilodon was not extinct. In the eighth room, the Cabinet of Wishes Fulfill’d, she was chosen as a volunteer.
Apparently this story was partly inspired by a Frazetta painting. Awesome.
We all have our needs –
a hunger for friends, or meat;
and some of us feed.
Ever run in to someone you used to know, and wonder what happened to them? Ever wish they hadn’t told you?
Pages from a Journal Found in a Greyhound Bus Somewhere Between Tulsa, Oklahoma, and Louisville, Kentucky
Dreams of roads and rain
in America’s motels,
searching for yourself.
There’s no better place to work out what you’re after than a booth at an all-night diner. If that doesn’t lead anywhere, you might really be lost – or at least there’s a long road ahead. Refill?
Barbecue Sunbird –
a summer delicacy!
Ashes, hatch, repeat.
I want to hang out with Zebediah T. Crawcrustle.
Each year, here we meet
to drink and feast but most to
make you monsters weep.
This story features characters from American Gods, and is set in the world of that novel. It’s a spin on the legend of Beowulf and Grendel, inflected by the American Gods idea that mythical figures exist but subsist only on the strength of human belief. The central question of Monarch of the Glen is simply this: what makes a monster?
Posted on Tuesday, June 15th, 2010. Tags: books, haiku, reviews.
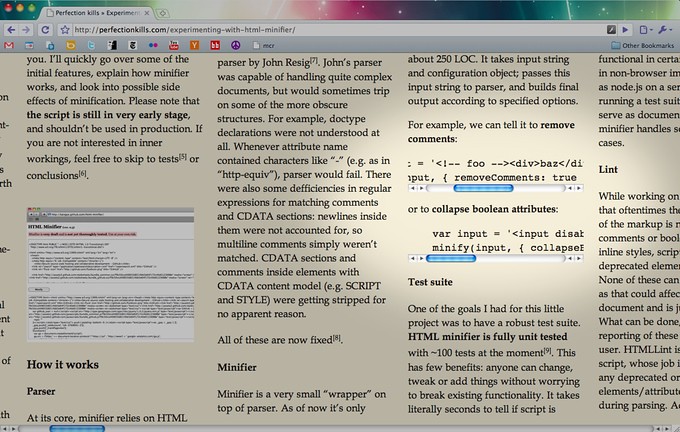
McReadability
Readability is a simple tool that makes reading on the Web more enjoyable by removing the clutter around what you’re reading. McReadability (“Multi-column Readability”) is a new stylesheet for Readability that formats the text in constant-height columns arranged side-by-side. It works best with lengthy texts.


For more screenshots and information, view these previous posts.
McReadability is now hosted at GitHub! Set up your bookmarklet here: anoved.github.io/mcreadability
Posted on Monday, June 14th, 2010. Tags: code, css, javascript, readability.