Tag Archive: “3d”
Creating Heightmaps of Large Regions
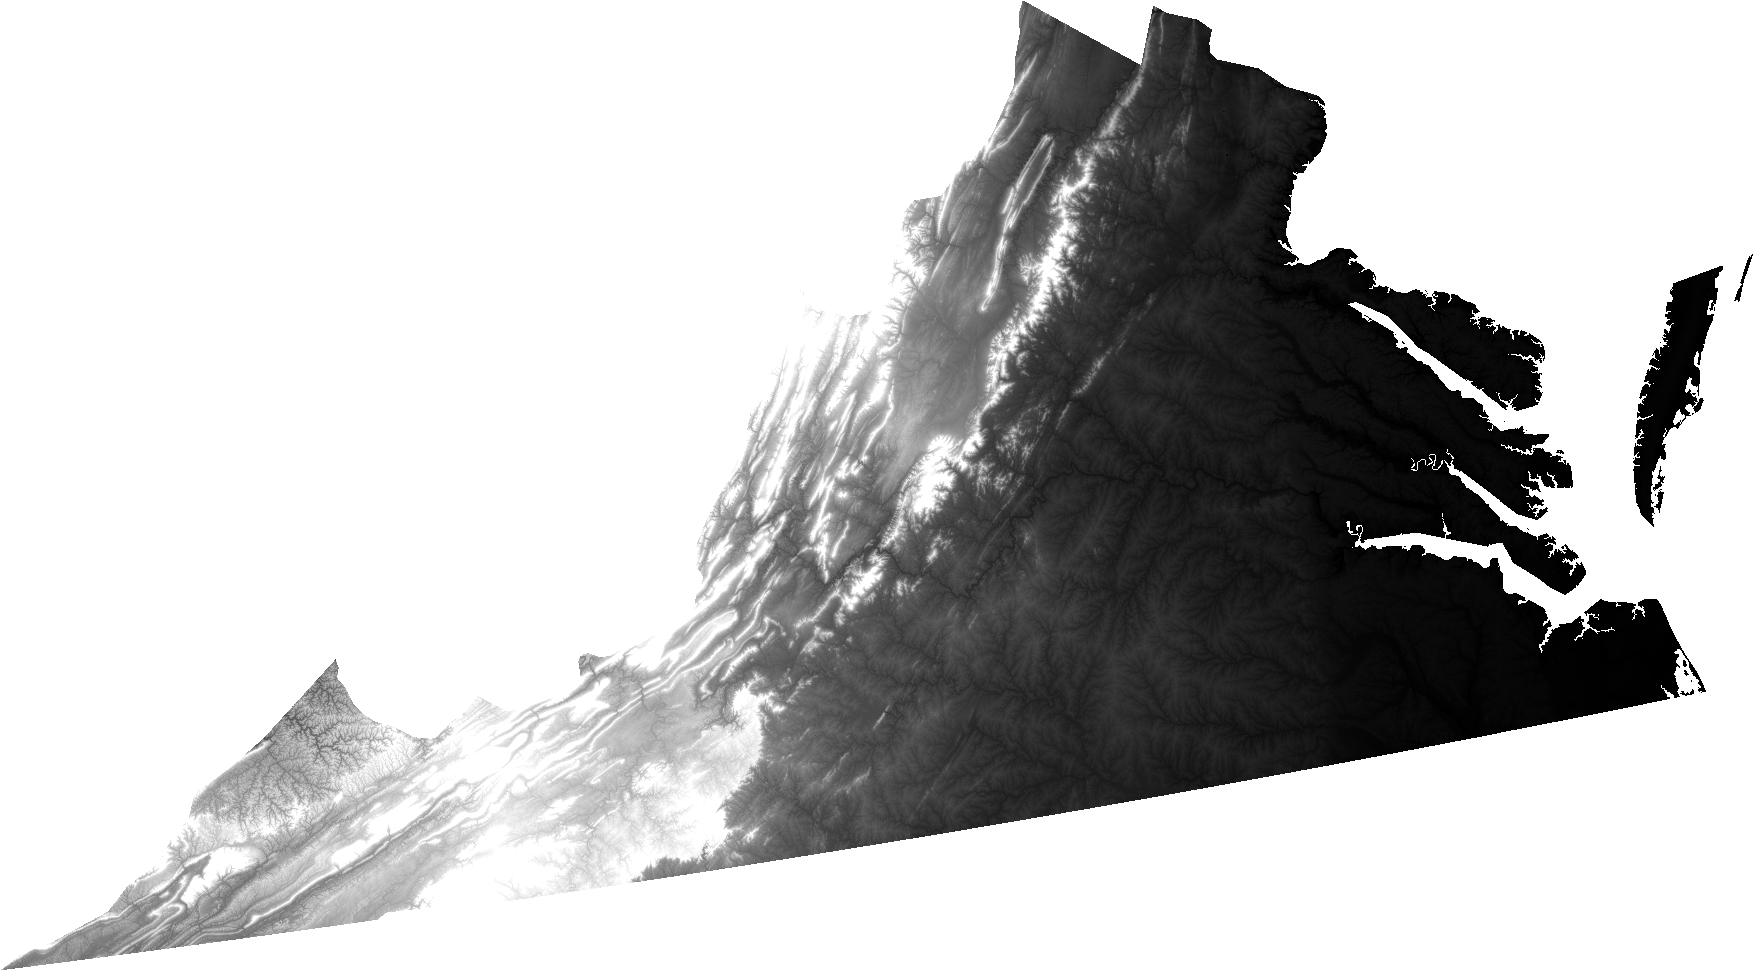
An open question from Josh Ajima about making 3D printable models of Virginia prompted me to consider the general problem of finding a suitable elevation dataset for a large region like a state.
@DesignMakeTeach Here’s a start. (https://t.co/qS9F9kWMeQ clipped to state boundary & saved at quarter res. in QGIS) pic.twitter.com/hmwwX7dj6U
— Jim (@anoved) September 28, 2015
In this post I will explain how I made the image I posted in reply, using free tools and data.
Posted on Tuesday, September 29th, 2015.
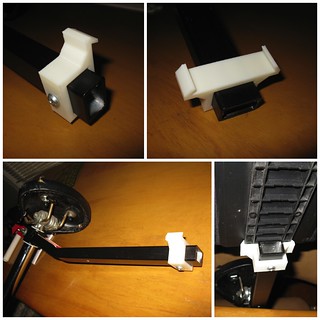
Adjustable Phone Clamp and Assembly Animation
I made some parts to combine a length of ½” PVC and a tripod into a mount to hold my phone in any position over my desk or workbench. (This could be useful for recording more timelapse drawing clips…) The ball joint clamp design is inspired by a commercial dashboard mount but redesigned to be easily printable without support. Find the files and more details on Thingiverse, including an easily customized version of the phone clip for compatibility with other devices.
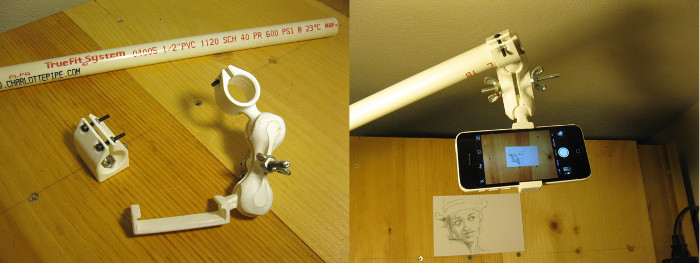
I designed the parts with OnShape. To date I have been focused on learning how to draw within Part Studios. After designing and printing these, I decided to see if I could connect them in an Assembly. To my surprise, it worked, despite having known nothing about mate connectors while drawing the parts. Pretty neat to be able to explore mechanical interactions in software.
Posted on Monday, September 28th, 2015.
Conserving Onshape Document Size
A useful feature of Onshape is revision history, allowing you to inspect or restore any previous state of your design. Reasonably enough, complex revision histories can easily inflate the storage size of your documents – especially if, like me, you learn by making a lot of trial and error modifications to your work-in-progress parts. Although I think the free plan is generous, it does have limits, so document size can become a concern.
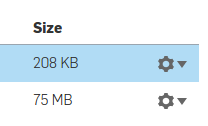
For example, here are the sizes of two designs of similar complexity. One is a buckle and the other is a fan plate. The latter is only slightly more intricate than the first (and very simple indeed by professional CAD standards), yet it weighs in at 75 megabytes compared to only 208 kilobytes. That’s useful data for a product or project where the provenance of each change is important, but in this case I know the revision history is mostly junk because it contains hours of doodling before I figured out how to achieve the final design.
So what can do if you want to reduce a document’s size and you know you don’t need all the dust swept under the revision history rug? Barring any overlooked or unimplemented history management features, you can copy a fresh instance of a part studio into a new document. It turns out that doing so discards the revision history and can thus greatly reduce document size. (The feature list steps actually used to create the part are, of course, retained.)
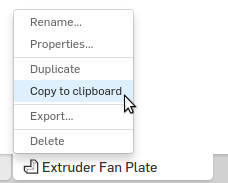
First, right-click the part studio tab in question and select Copy to clipboard. (This is some sort of “cloud” clipboard, not your system clipboard.)
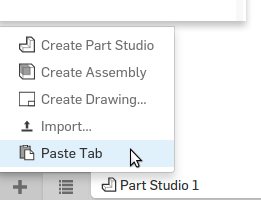
Next, create a new document. Click the new tab button and select Paste Tab. Now you’ve got the same part you started with, minus embarassing memories of mistakes made during its initial design.

Size comparison: the fresh copy of that 75 megabyte design is only 1 megabyte.
Posted on Sunday, September 6th, 2015.
Making Extruded 3D Models of Inkscape Illustrations
So, you have some vector artwork in Inkscape and you want to make it into a stamp or some other sort of 3D-printable gewgaw. Here are two ways to give your paths some depth. One uses Onshape for an interactive approach. The other uses OpenSCAD for a more programmatic approach. Both are parametric, permitting subsequent revision without restarting from scratch.
Posted on Thursday, August 20th, 2015.
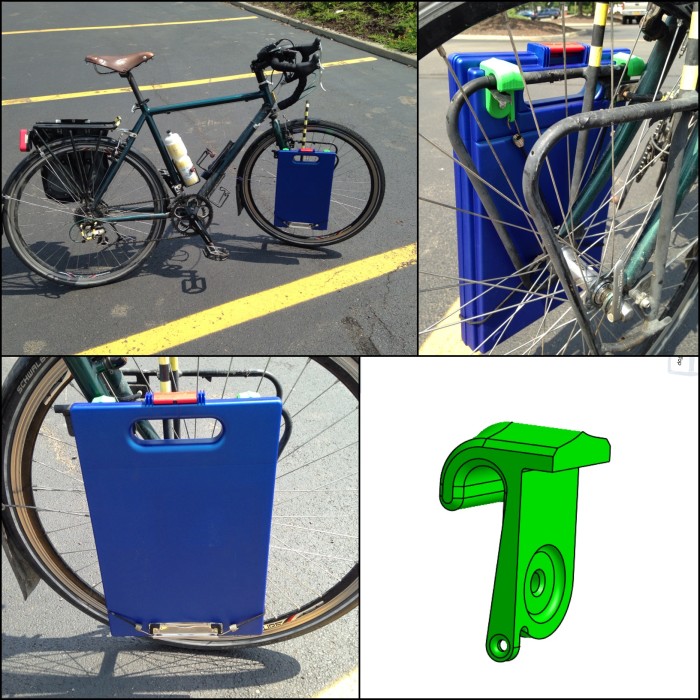
Clipboard Case Pannier Hooks
Found this clipboard document case at Staples and turned it into a compact clamshell pannier.
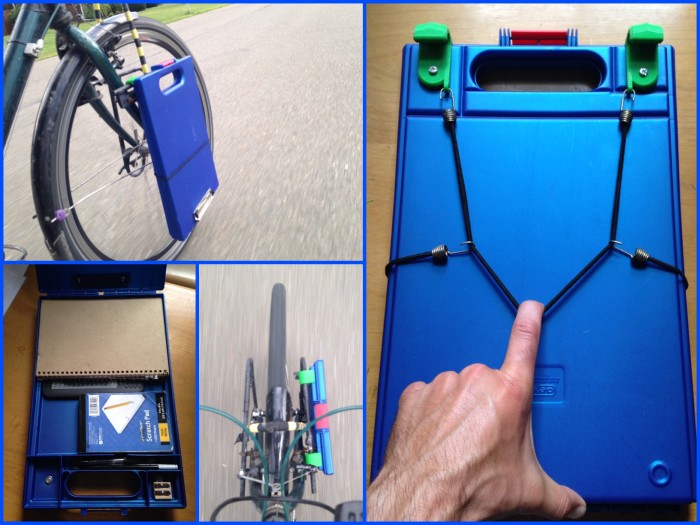
Find the printable STL files for the green hooks as well as a few more photos and details at Thingiverse. Alternatively, fork or view the parametric model at Onshape.
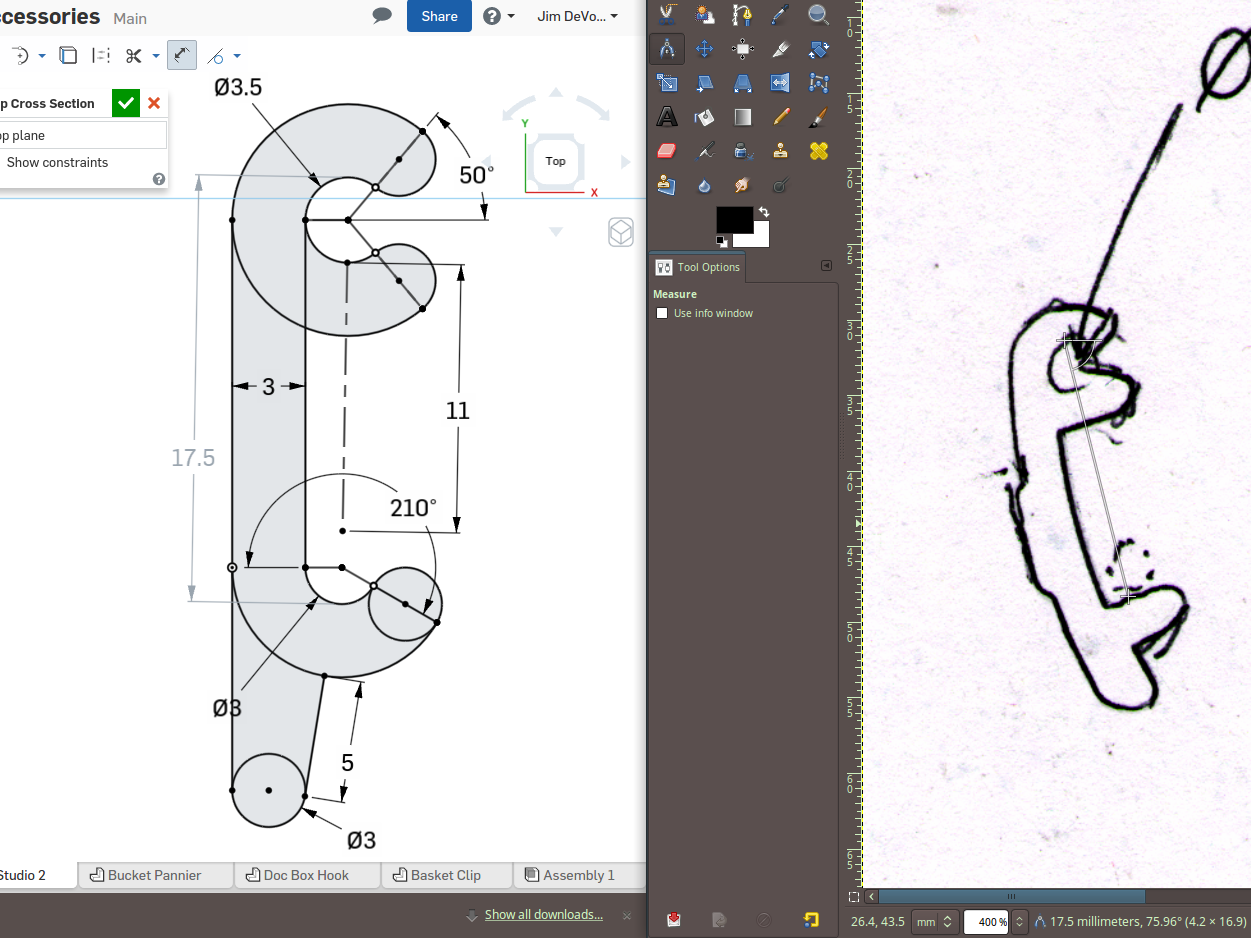
Bonus image: sketching a stronger clasp, using a scanned paper trace of the original as an admittedly not very useful reference:
Posted on Tuesday, August 18th, 2015.
3D Printing a Stamp of a Drawing
Here’s an original marker doodle and the digitized version I made with Adobe Shape CC:

I opened the SVG file in Inkscape and converted the paths to extruded polygons with paths2openscad by Dan Newman. I added a solid base and printed the model as a simple stamp.
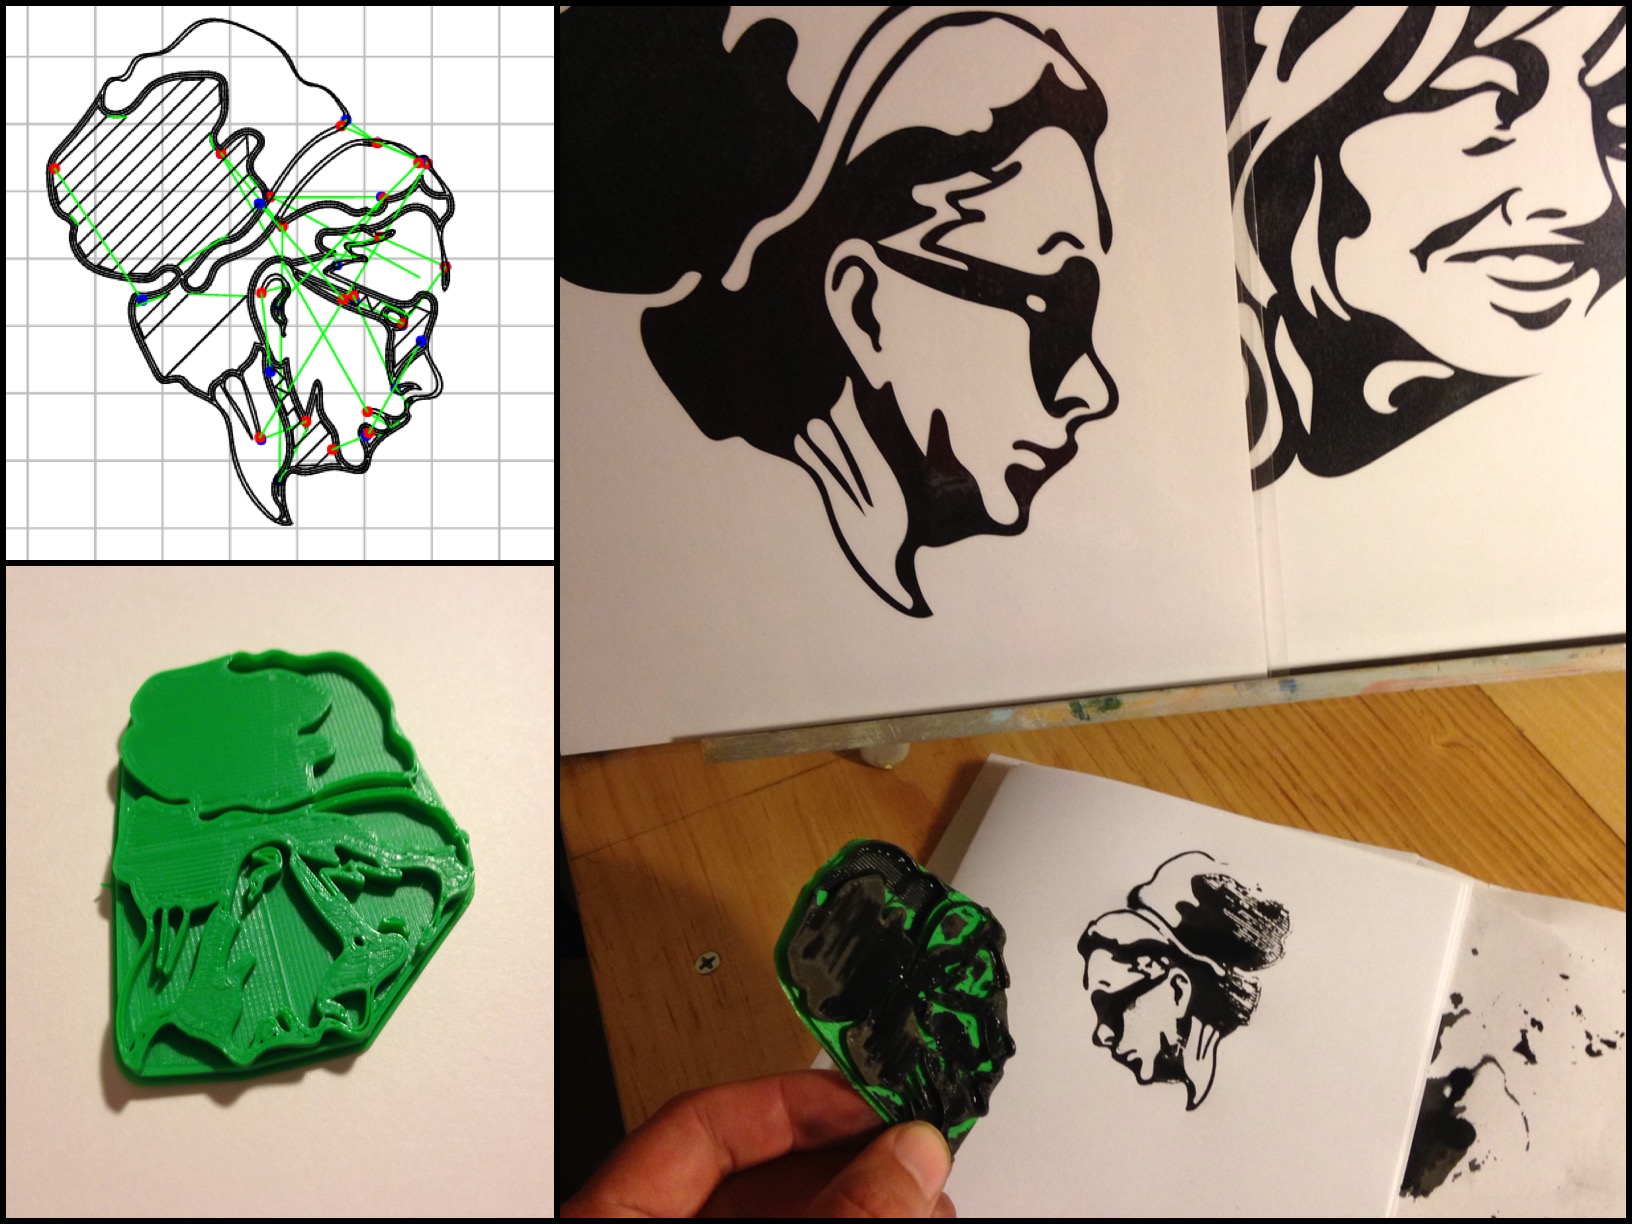
It doesn’t work great, but it does work! I’m brushing India ink directly onto the stamp. The printed PLA plastic is not an optimal surface for holding or transferring ink, as it tends to either blot or bead and run off. Here is the best print I was able to make in about a dozen tries:

Posted on Saturday, August 15th, 2015.
Import STL Models to Onshape Part Studios using FreeCAD
Onshape is a sweet new parametric CAD system that runs in your browser. It can import designs from various CAD formats, but it cannot import the ubiquitous STL format popular in the 3D printing world. (Technically, it can indeed import any file type, but only for storage; only select formats can be converted to an editable part studio.)
I don’t know jack about FreeCAD, a cross-platform desktop CAD system, but it can be used to convert STL files to another format (STEP) that can be successfully imported into Onshape.
Posted on Thursday, July 30th, 2015.
Combining Course and Terrain Models with Boolean Modifiers in Blender
I don’t know jack about Blender, the free 3D modeling program, but I have found it useful for combining pieces of my 3D printed landscape models. It performs boolean operations quickly and produces clean output (valid STL files). However, the interface is notoriously intimidating to new users – myself included – so here is a screenshot-illustrated guide to the process I’ve worked out to make a few types of route + landscape models.
This is not a general-purpose tutorial. It is focused on the task of combining an STL terrain model with an STL course model. Both inputs are assumed to exist and to be pre-aligned at the same scale and orientation. (I will explain my process for creating those models in a subsequent tutorial.)
Posted on Thursday, July 30th, 2015.
So I’ve Been Making Vases
I’ve been designing, printing, and publishing a series of customizable containers on Thingiverse. It’s a good exercise in learning OpenSCAD, the scripting language that powers Thingiverse Customizer. An OpenSCAD script describes the shape of a model, given some initial parameters. Customizer provides an interface to easily plug in new values. It’s a good way to get a lot of use out of your initial design by repeatedly remixing it. Plus, by providing something to start with, I think customizable designs help encourage people new to 3D design to try their hand at it.
I printed some sample designs on my Printrbot Simple. Here are the glamor shots, each linked to the customizable models from which they were derived. Click for more photos and details.
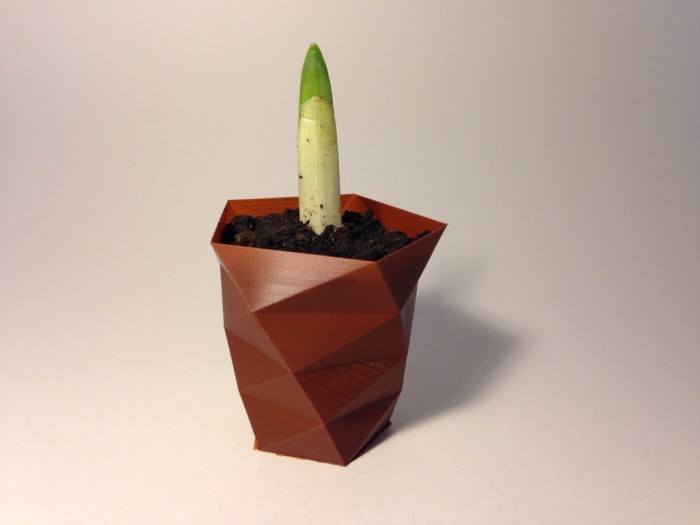
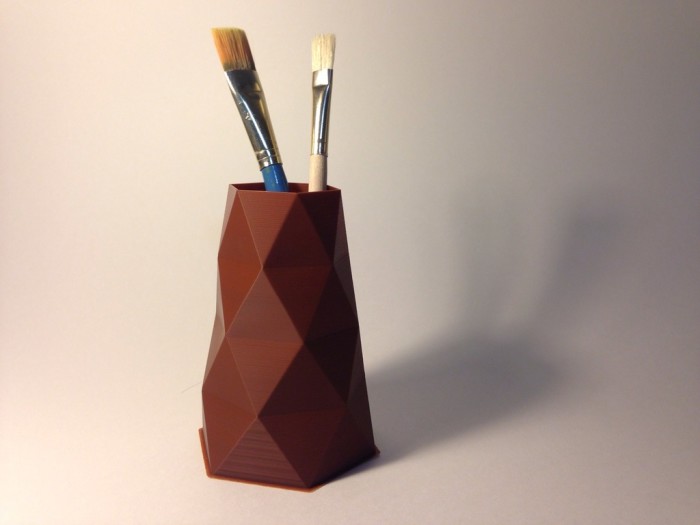

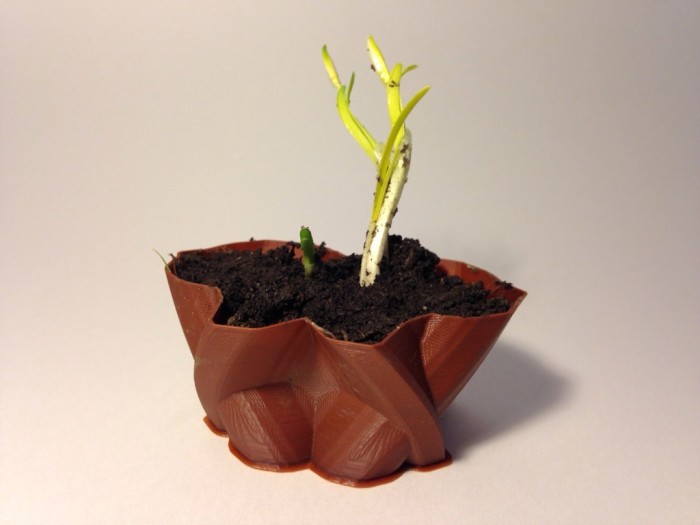
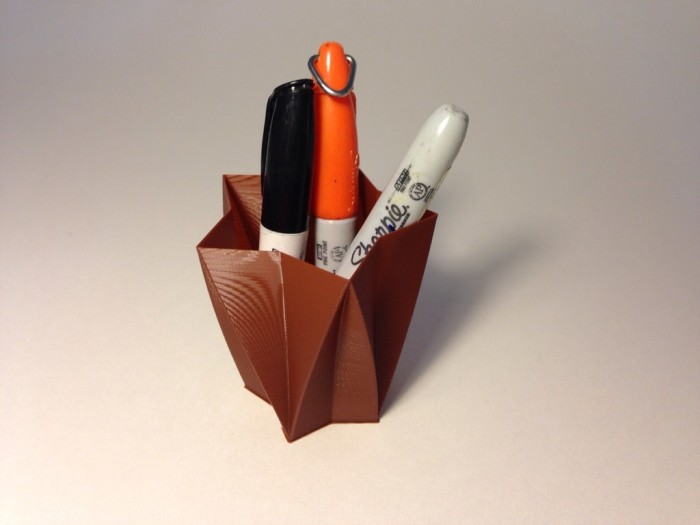
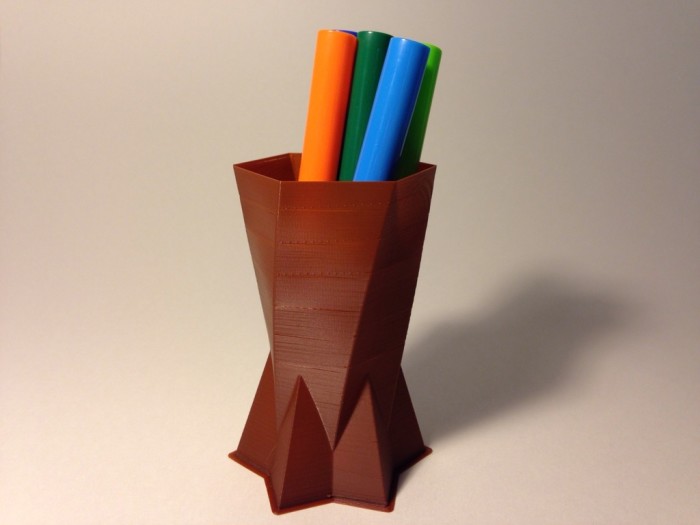
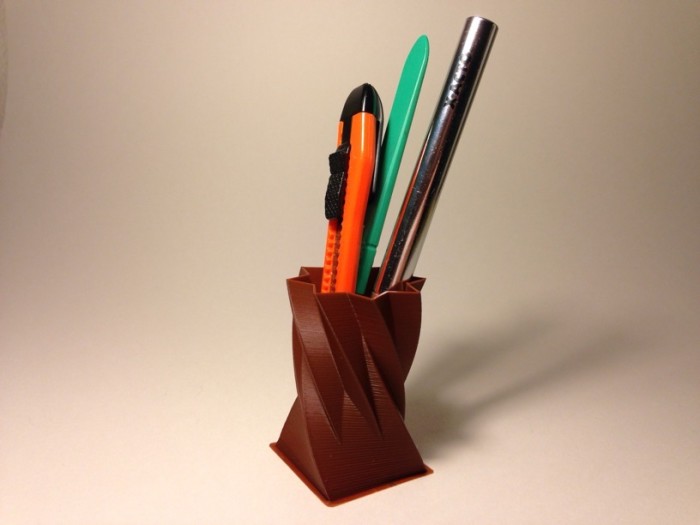
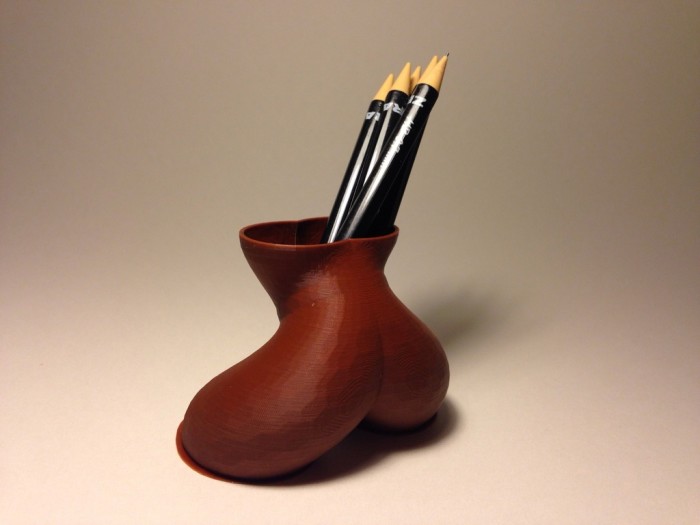
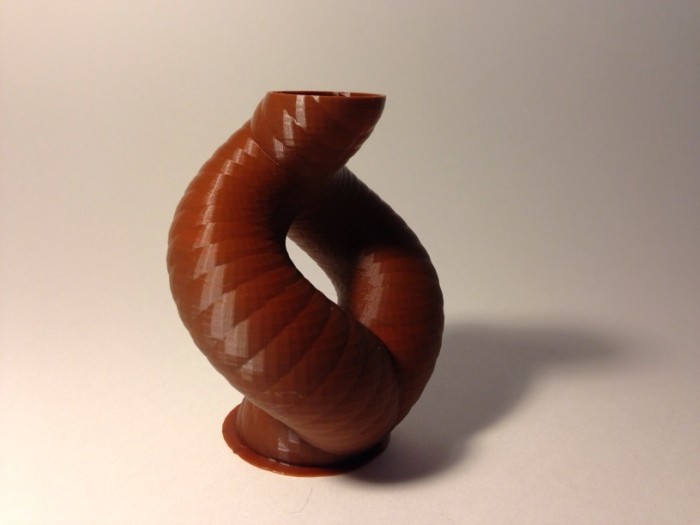
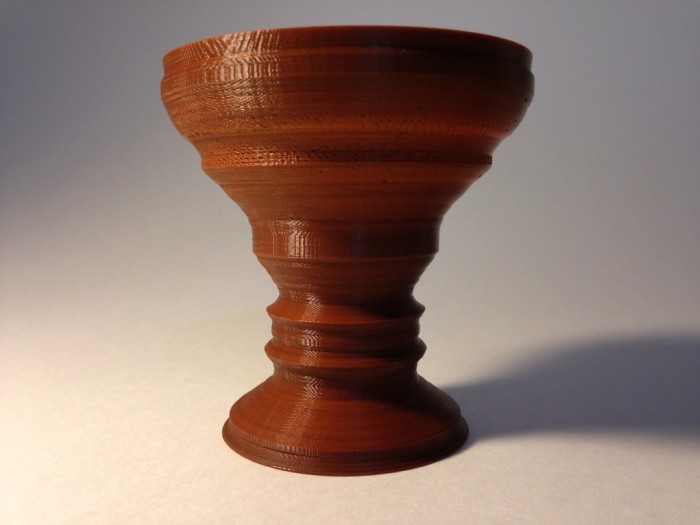
That last one, the chalice lathe, was the featured design on the front page of Thingiverse last weekend. Note the figure-ground effect in the sample’s profile. Although I’m proud to have been featured, what’s most exciting is to see the many creative remixes people have posted.
Posted on Friday, March 21st, 2014.
3D Printing Projects
If you’ve been following my recent posts here and elsewhere, you’ve probably noticed a recurring theme: 3D printing. The immediate source of this new interest is the Makerbot my dad is hosting at school, thanks to the forward-thinking investment of DCMO BOCES. Read more about 3D printing in the library and other related topics at my dad’s blog.
The plastic objects produced by today’s 3D printers aren’t really anything new, but the ability to make them at home in an afternoon certainly is.
No retooling is necessary to create different objects with additive manufacturing. This removes a barrier to the creative experimentation and iteration that is a vital part of craftsmanship. Plastic has unique properties, but unlike materials such as wood and metal, which were worked by hand for generations before the advent of mass production, plastic has never been an artisan medium. The plastic objects produced by today’s 3D printers aren’t really anything new, but the ability to make them at home in an afternoon certainly is. So, I think there is a potent sense of empowerment driving interest in this technology.
For similar precedent, see how the proliferation of affordable computing power has transformed our access to information, if not society itself. 3D printing has already enabled individual artists, engineers, and entrepreneurs to realize their ideas. I am curious what influence it could have on [mass-produced, disposable] material culture at large.
Parts
More immediately, I see 3D printing as an opportunity to make better use of the things I already have. In particular, I saw it as way to reuse or repair the many bike accessesories I’ve accumulated, which sometimes end up unused due to misfit or MIA mounting hardware. A custom-printed bracket fits more securely than zip ties and duct tape but is more affordable than a factory-ordered replacement, if one is even available.
This shim adapts the clamp of a spare beam rack to the smaller diameter seatpost of my old folding bike:
This piece is part of a set intended to let my trunk bag attach to the same beam rack. The bag has a plastic rail on the bottom which slots into grooves in compatible racks. I’ve not quite perfected the rail fit yet.
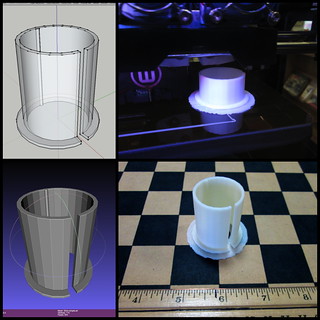
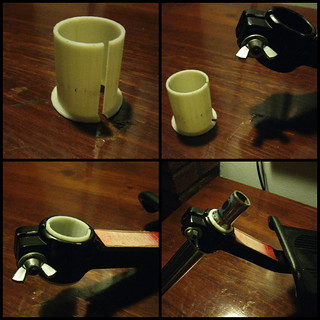
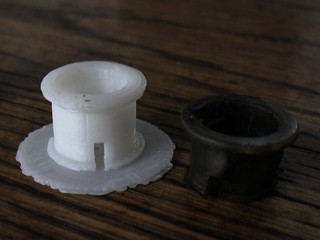
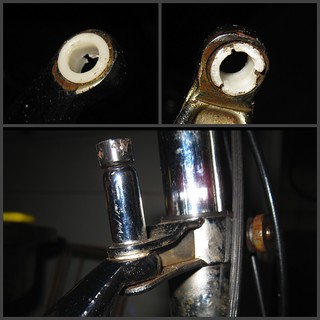
This small sleeve replaces the folding bike’s original steering joint sleeve. It’s a tough act to follow, as the sleeve must be snug enough to prevent play (disconcerting at speed!) but loose enough to let the pin be inserted or removed with ease to facilitate folding. We printed a couple versions to experiment with different infill (density) settings.
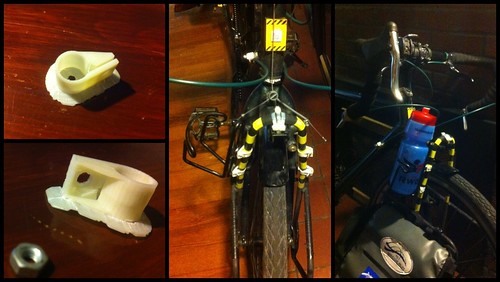
With three water bottle cages, my bike already has more fluid capacity than most. That’s no reason not to add hardpoints for two more, though. These little clamps fit the tubing from which my bike’s front and rear racks are built, and can be installed in pairs to provide bolt points for water bottle cages (or other gadgets, I suppose) wherever there is room. Partly an experiment in designing surfaces thin enough to take advantage of plastic’s flexibility for snap-on installation.
Programs
I’ve also been writing some little programs to help generate printable objects.
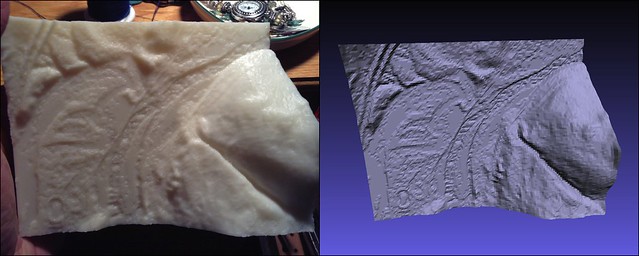
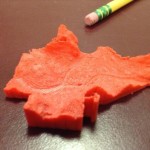
Previously introduced here, hmstl makes printable landscape models – geographic manipulatives – from heightmap images. (The name is a cryptic abbreviation for “Heightmap to STL”, STL being a common 3D file format suitable for printing.) Here’s a picture of the printed output next to the hmstl model:
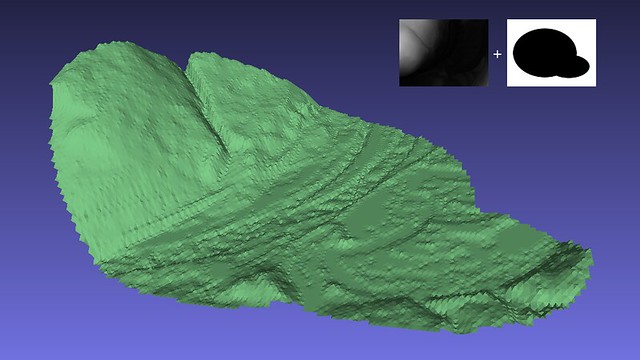
The program optionally accepts a “mask” image; masked areas are not included in the output. This can be used to generate models of non-rectangular areas. Here’s an arbitrary example using an oval mask:
Here’s a more meaningful example. The heightmap represents the elevation of the area around Binghamton, NY, while a mask image was used to cut out a model of the actual city limits:
Another program is ridge-o-gram, introduced here, which produces “lenticular” models from black and white image pairs. The pixels of each image are presented as the left and right faces of a series of ridges, so that one image is seen when you view the object from the left and the other from the right. Intended to take advantage of the Makerbot 2x’s dual extruders by printing the “black” and “white” image components as interlocking perforated layers. Haven’t quite managed a successful print yet, in part because the output is pretty complex and perhaps near the limit’s of the Makerbot’s resolution, at least for non-tiny images.
Under the hood, hmstl and ridge-o-gram both use libtrix, a crude C library I wrote to handle the repetive task of formatting triangle coordinates for STL files output. It is crude in the sense that it does nothing to enforce valid geometry – it’s just the simplest possible shortcut for reading and writing STL files, so it trusts the application to generate printable shapes. A fun exercise in reinventing the wheel, though.
Naturally, I’ve got a bunch of ideas for other parts and programs, including friendlier web-based ways to use the programs, but we’ll save that for later.
Posted on Monday, December 9th, 2013.