Bézier Bowl
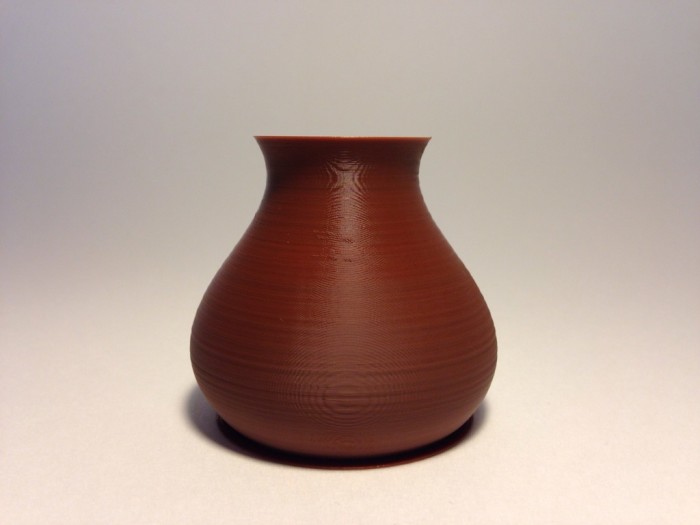
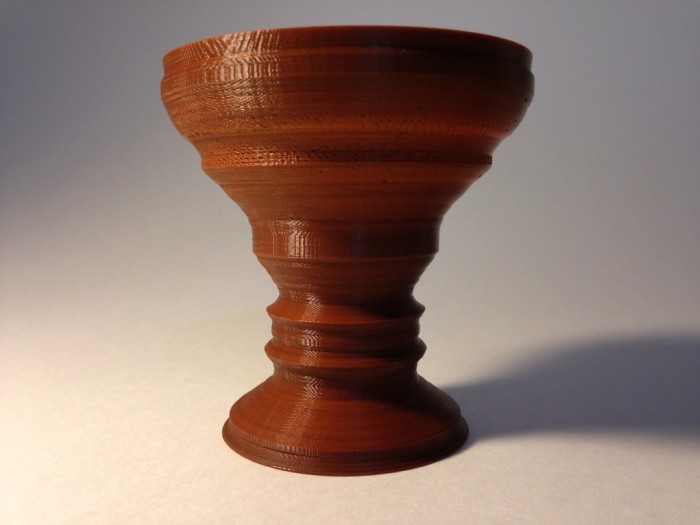
One more vase-type-thing: a customizable “Bézier bowl”. It produces models by rotating a cross section around an axis, just like my chalice lathe. The difference is that instead of drawing the cross section directly, you draw control points to define the path of a smooth Bézier curve.
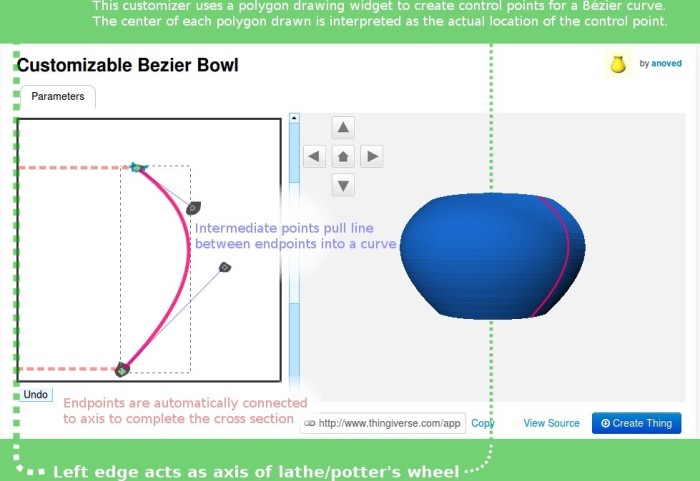
Bézier curve tools are found in many drawing programs. Normally they feature a live preview of the line with interactive handles for the control points. Since the Thingiverse drawing widget wasn’t exactly designed for this sort of [mis]use, a bit of imagination is required to visualize how the customizer works. I annotated this screenshot with labels and the correct Bézier curve overlayed with Inkscape. It’s linked to a video clip showing the customizer in action:
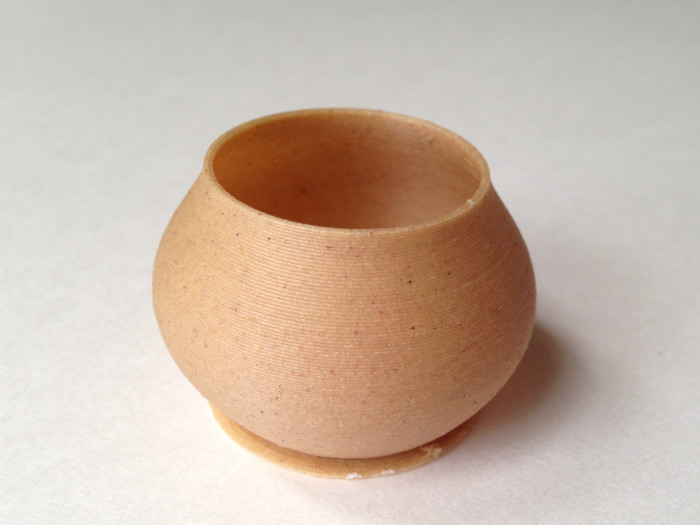
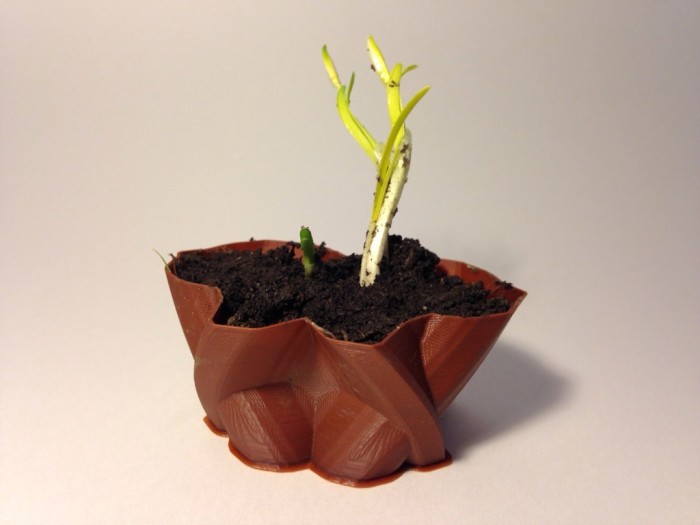
I printed the bowl shown in that example. It was the first thing I’ve printed with ColorFabb woodfill, a filament composed of conventional PLA infused with wood fiber. (I got mine in a sample pack from Printed Solid.) Here are the results:
I had some trouble getting started with the woodfill because it is much runnier than regular PLA. As a result, it really oozes out of the extruder when idle, and seems prone to jamming/clotting if not extruded continuously. However, after increasing retraction (to compensate for ooze during travel moves) and boosting print speed (to keep up with the flow), it prints quite reliably.
The finish is pretty remarkable, too; definitely woodlike, but of course with an artificially uniform fine grain. Thin-walled woodfill objects almost feel a little unearthly – like wood to the touch, but translucent and feather-light.
Posted on Wednesday, March 26th, 2014.
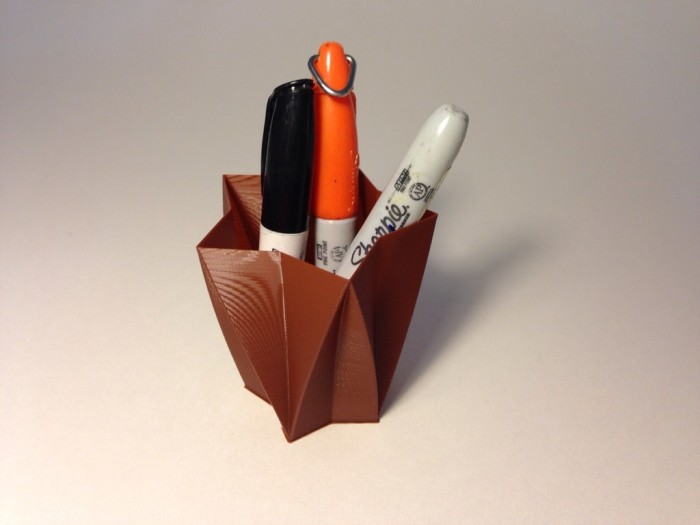
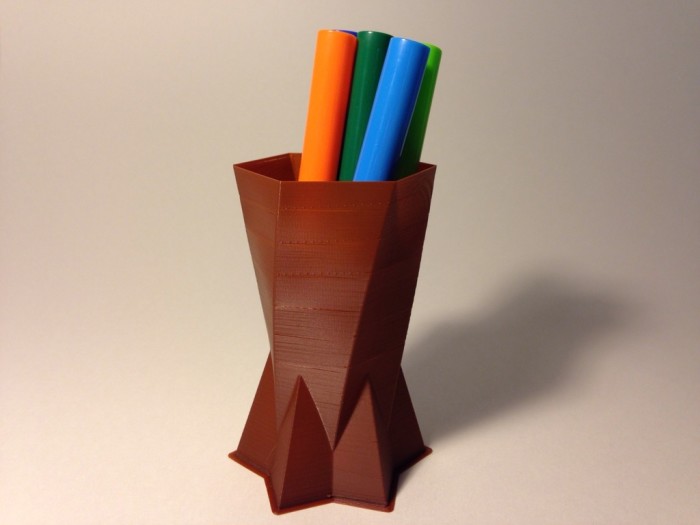
So I’ve Been Making Vases
I’ve been designing, printing, and publishing a series of customizable containers on Thingiverse. It’s a good exercise in learning OpenSCAD, the scripting language that powers Thingiverse Customizer. An OpenSCAD script describes the shape of a model, given some initial parameters. Customizer provides an interface to easily plug in new values. It’s a good way to get a lot of use out of your initial design by repeatedly remixing it. Plus, by providing something to start with, I think customizable designs help encourage people new to 3D design to try their hand at it.
I printed some sample designs on my Printrbot Simple. Here are the glamor shots, each linked to the customizable models from which they were derived. Click for more photos and details.
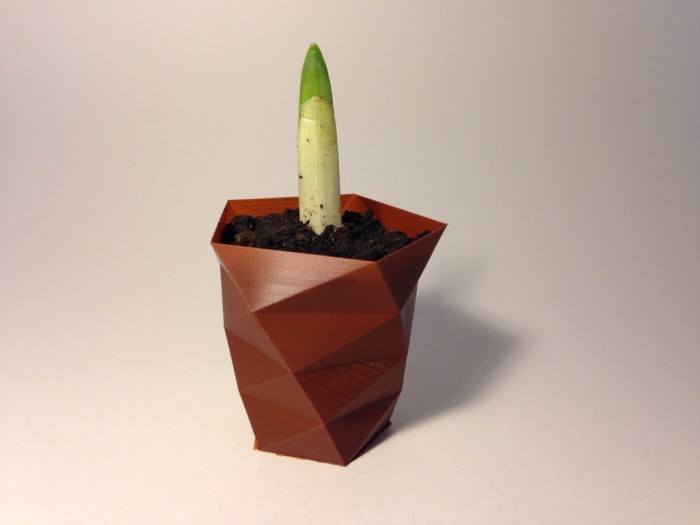
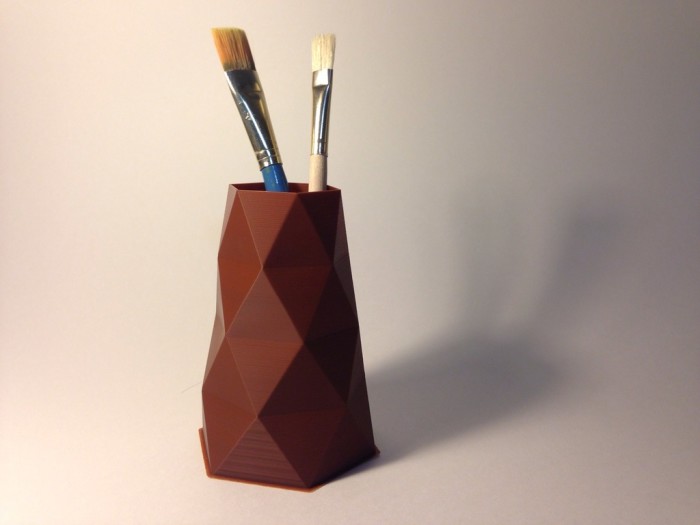

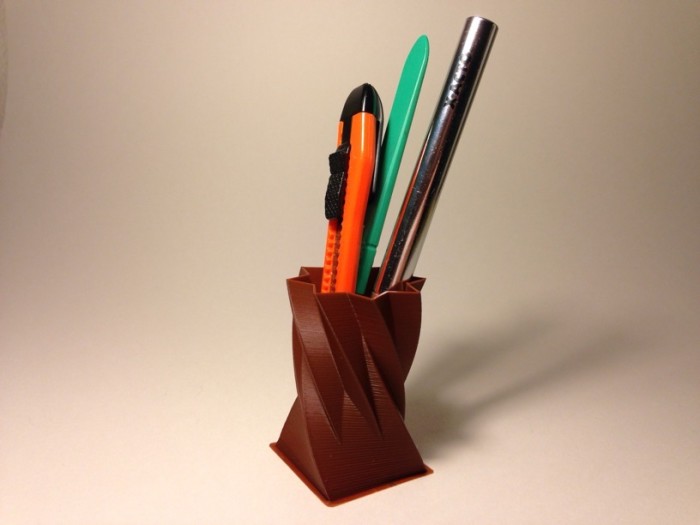
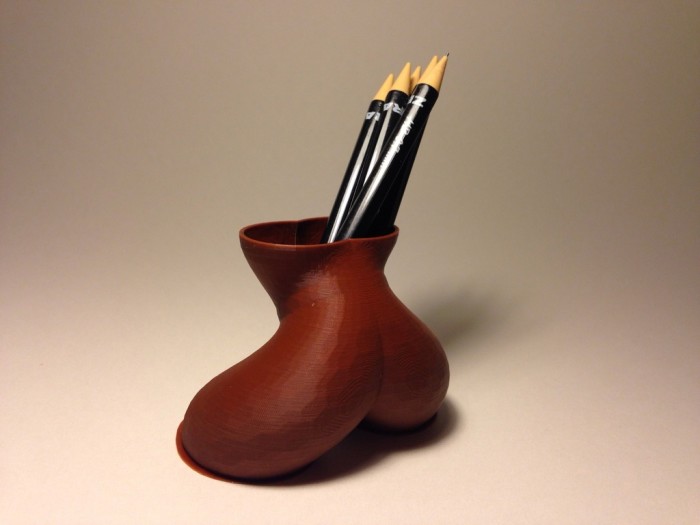
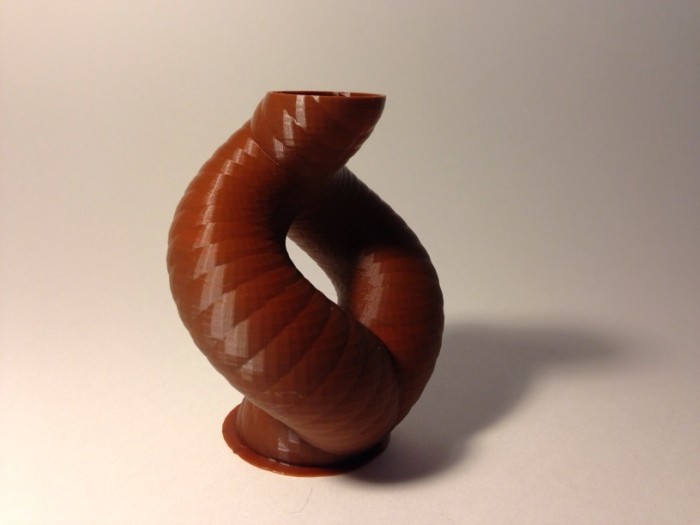
That last one, the chalice lathe, was the featured design on the front page of Thingiverse last weekend. Note the figure-ground effect in the sample’s profile. Although I’m proud to have been featured, what’s most exciting is to see the many creative remixes people have posted.
Posted on Friday, March 21st, 2014. Tags: 3d.
Printrbot Tensioner
As a followup to my post about making printable models from PDF part diagrams, here is a replacement Printrbot tensioner I made using that method. (The original did not need to be replaced; I just chose this part as a simple test case. It’s working great.)
The original tensioner is assembled from two laser-cut wood parts, numbered 21 and 22 in the Printrbot Simple’s diagram. I exported the patterns per the process described in the post linked above and combined them using the following OpenSCAD script. Note that part 22 has a partly recessed socket for a hex nut, which I exported separately.
module part_22() {
	difference() {

		// Part 22, with bolt holes
		linear_extrude(height=6) import("part-22.dxf");

		// Subtract the hex nut socket from part 22
		translate([398.15 - 394.29, 525.66 - 489.21, 3])
		linear_extrude(height=3) import("part-22-hex.dxf");
	}
}

module part_21() {
	// Part 21, not including hole through which 22 goes
	linear_extrude(height=6) import("part-21-solid.dxf");
}

union() {
	part_22();
	translate([0, 36, 458.88 - 462.4]) rotate([90, 0, 0]) part_21();
}
The parts are aligned using positions reported for each feature in LibreOffice. The actual position on the page doesn’t matter; only the difference between them is used to get things centered.
The STL exported from this script could be used to make an exact replacement for the original assembly. Instead, I imported it into SketchUp using the SketchUp STL plugin and made a few changes to simplify the part and make it easier to print without supports. This is the final version published on Thingiverse.
Posted on Tuesday, February 11th, 2014.
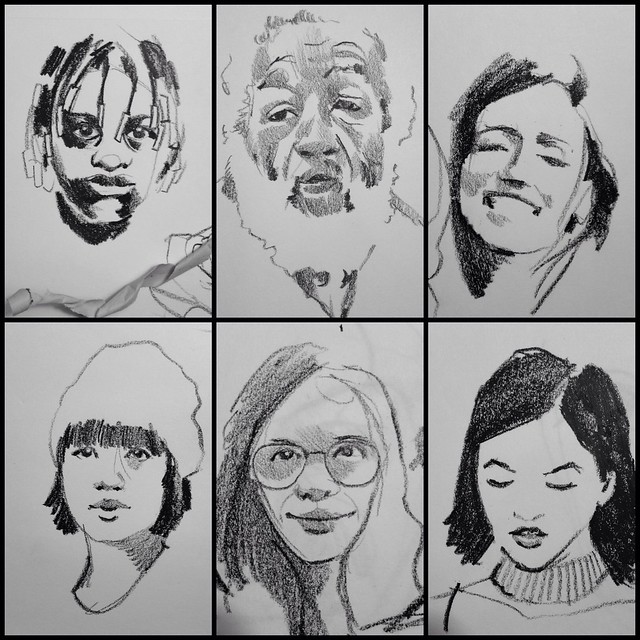
Making Faces Videos
I’ve been recording some time lapse videos of sketch sessions. Recorded at 5 seconds per frame; played at 5 frames per second. (25×?)
That last one is not of portrait drawing, of course, but of painting a 3D-printed landscape model.
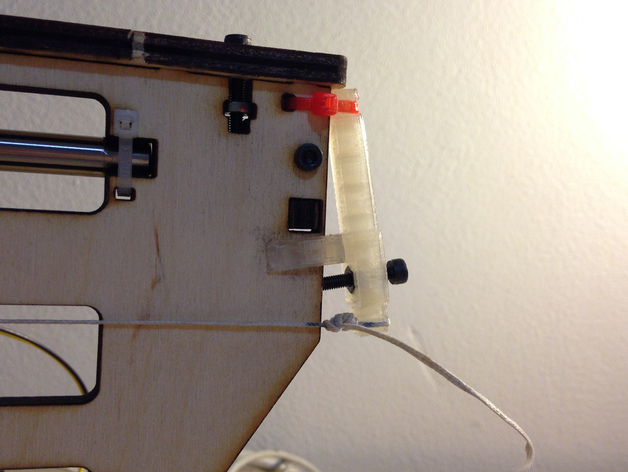
I’m using the lamp clip I designed and fabricated with my Printrbot to hold my phone for these recordings. I’m using Frameographer by the folks at Studio Neat to record the videos (and, sometimes, iMovie for iOS to combine and/or spruce up clips before uploading).
Posted on Monday, February 10th, 2014. Tags: art, drawing.
Mystic Crystal
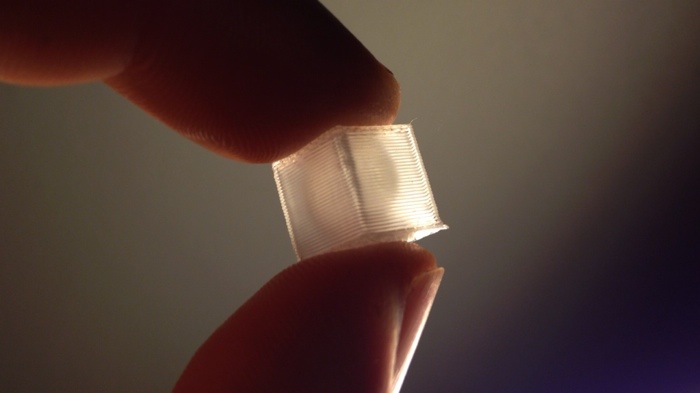
Printed a sphere inside a tiny cube. How cool is that?
With this plain translucent plastic, the inner contours are visible when the object is backlit. I think this has pretty cool artistic potential.
Posted on Wednesday, January 29th, 2014.
Sketches
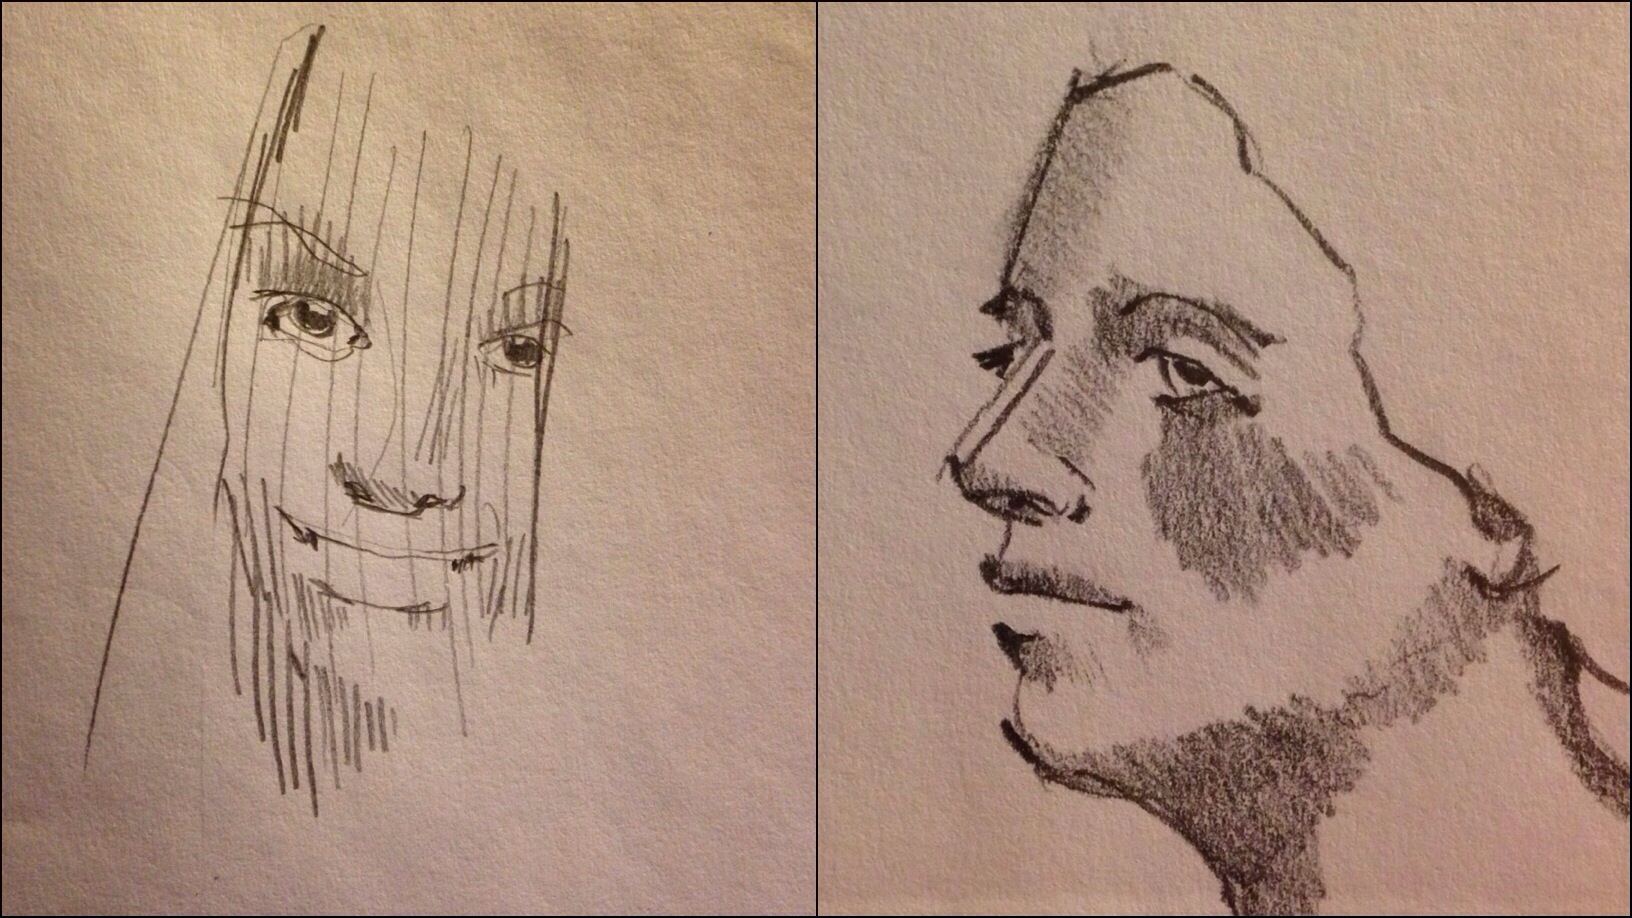
I like the vertical line base layer in the one on the left.
Posted on Friday, January 24th, 2014. Tags: art.
Making Printable Models from Parts Diagrams
Printrbot provides part diagrams of the laser-cut wood parts included with their printer kits. These diagrams are useful if you want to save even more on the cost of a kit by having the parts cut yourself. Alternatively, you can use these patterns to print replacement parts for your Printrbot using your Printrbot. Here’s a roundabout way to convert the part diagrams to printable models using only free software.
First, download a parts diagram from the Printrbot Support page for your printer. Here is the diagram for my printer (PDF).
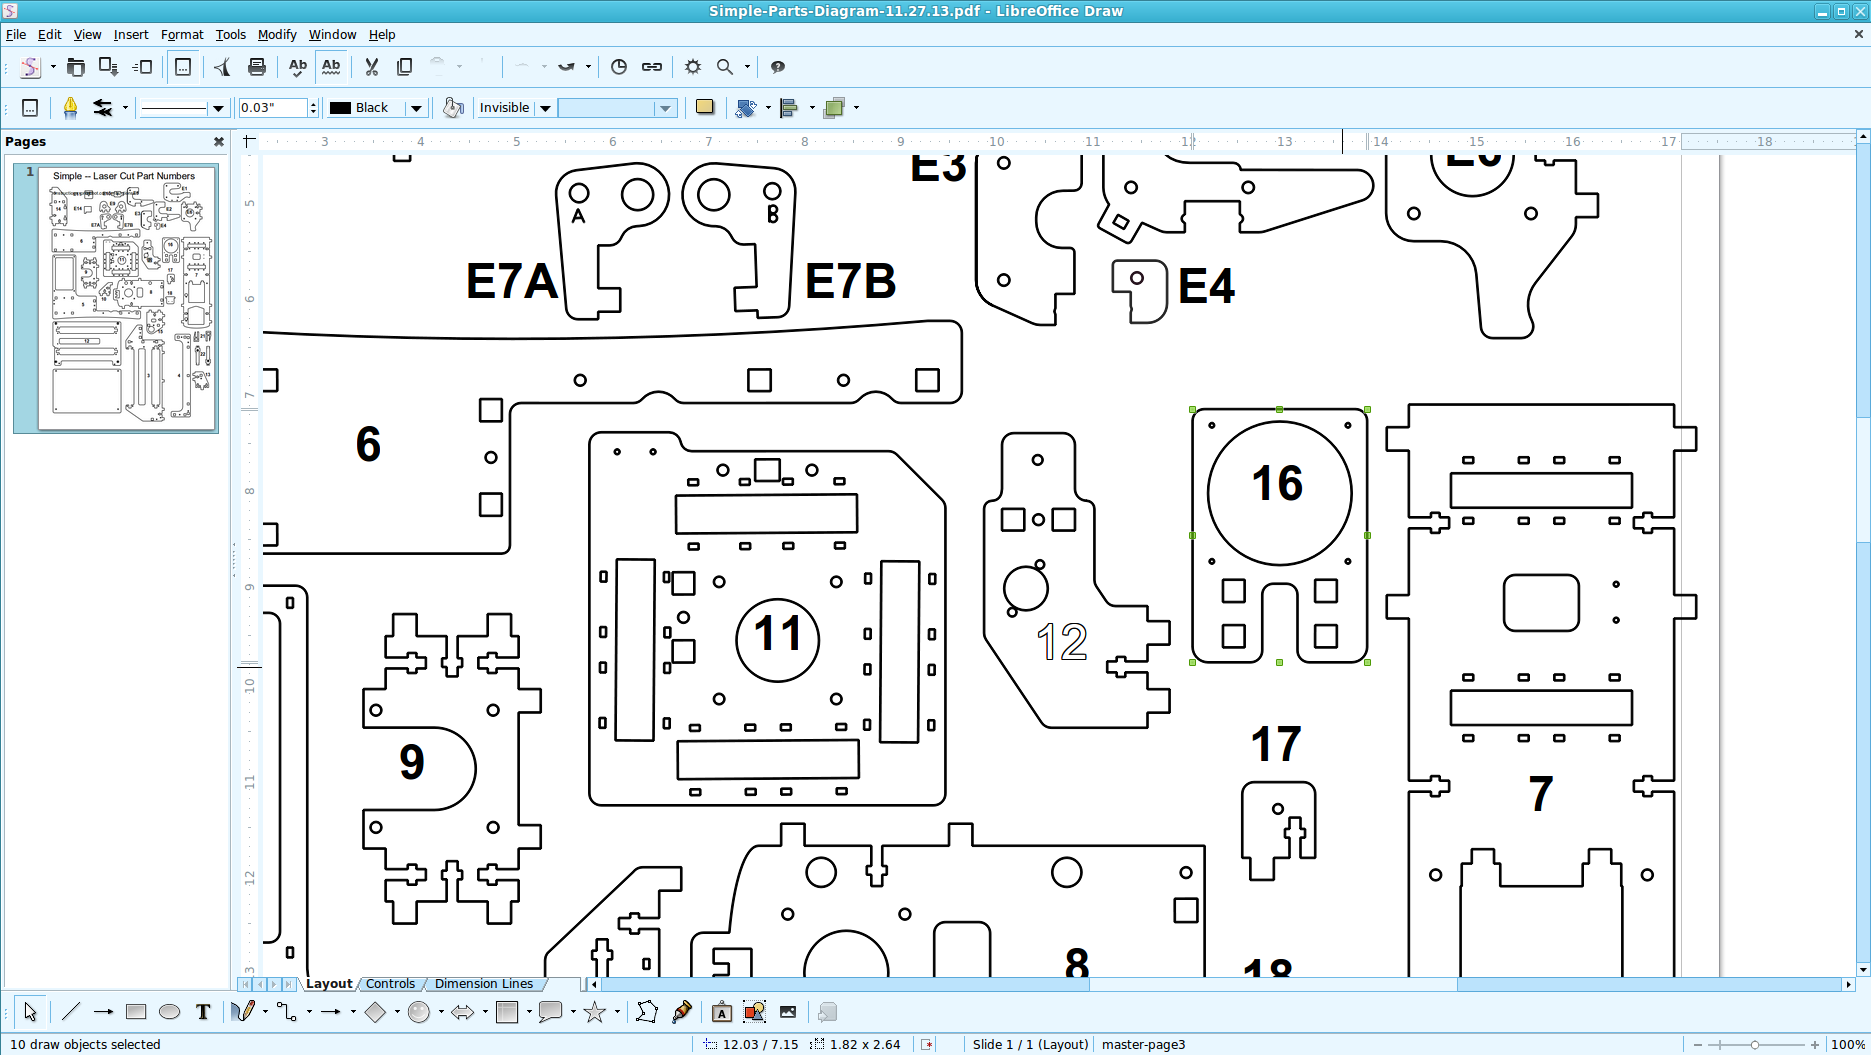
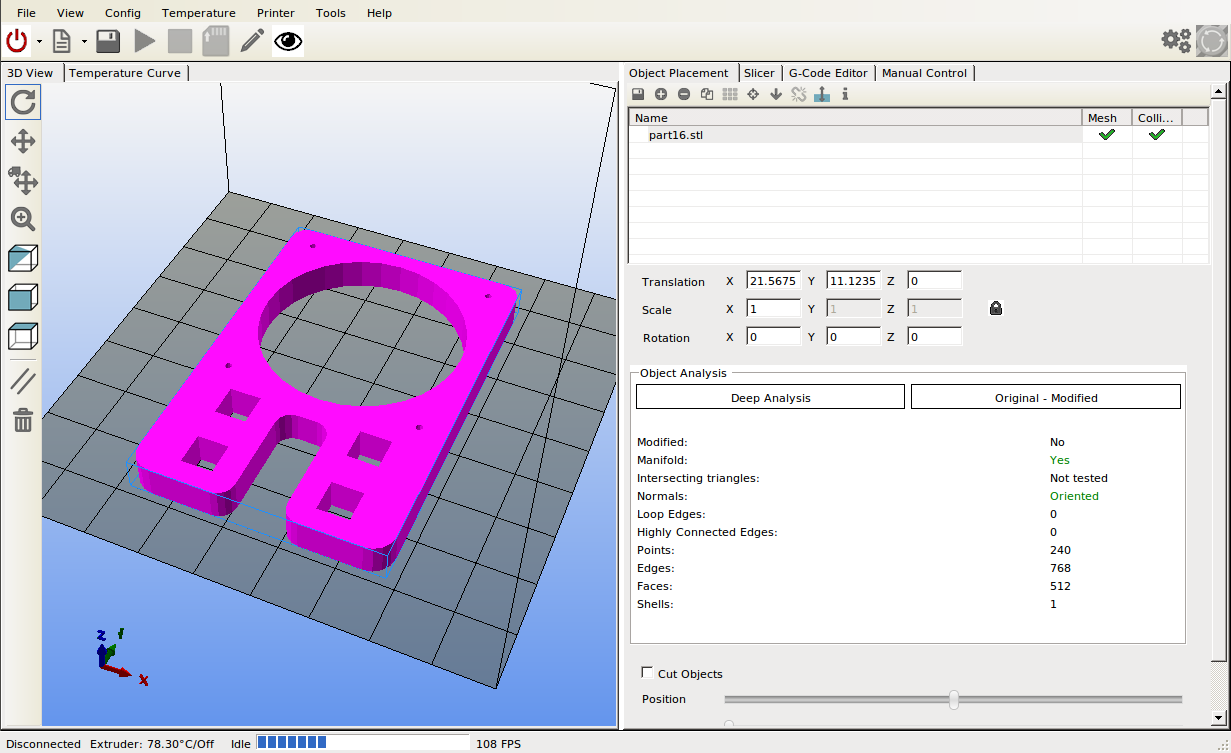
Open the PDF in LibreOffice. For this example, I’ll convert part 16, the cooling fan mount. Select the part, including holes, but not including the “16” label:
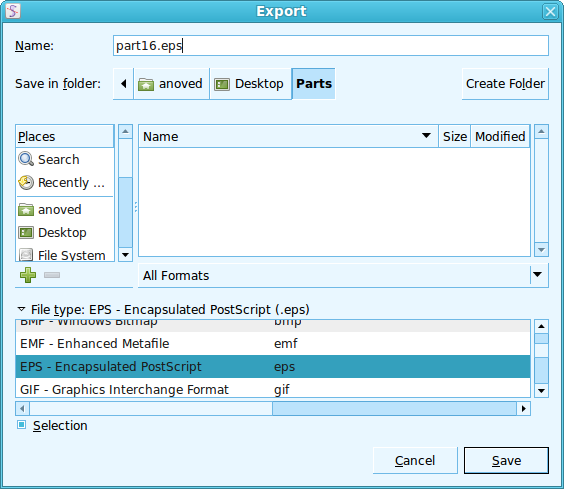
Select Export… from the File menu. Check Selection and choose EPS as the file type to export.
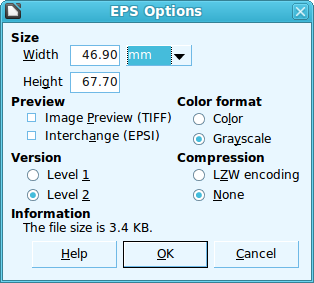
Be sure mm is selected as the unit in the EPS Options window. Click OK.
Convert the EPS file to DXF format using pstoedit:
pstoedit -dt -f dxf:"-polyaslines -mm" part16.eps part16.dxf
(There may be friendlier tools available to convert PDF or EPS files to DXF. DXF is needed because it is the only 2D format understood by OpenSCAD, which is used in the next step to extrude the outline into three dimensions. Printrbot part diagrams are available as DXF drawings, but I think it requires a bit more CAD expertise to extract individual parts from those files.)
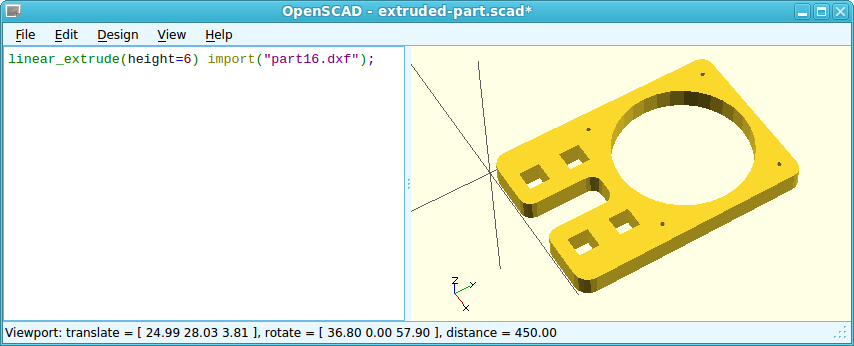
Use OpenSCAD to import the DXF drawing and give it depth:
linear_extrude(height=6) import("part16.dxf");
Finally, to get a printable STL file, select Compile and Render from OpenSCAD’s Design menu, then Export as STL… from the same menu. Here’s the result positioned in RepetierHost, ready to print:
Another thing to try would be to use OpenSCAD to union an assembly of multiple parts into a model you could print as a single piece for greater rigidity and ease of maintenance. You might also customize the model to accomodate different components. This article on using fasteners with printed parts is worth a look for useful design tips, too.
Posted on Friday, January 24th, 2014.
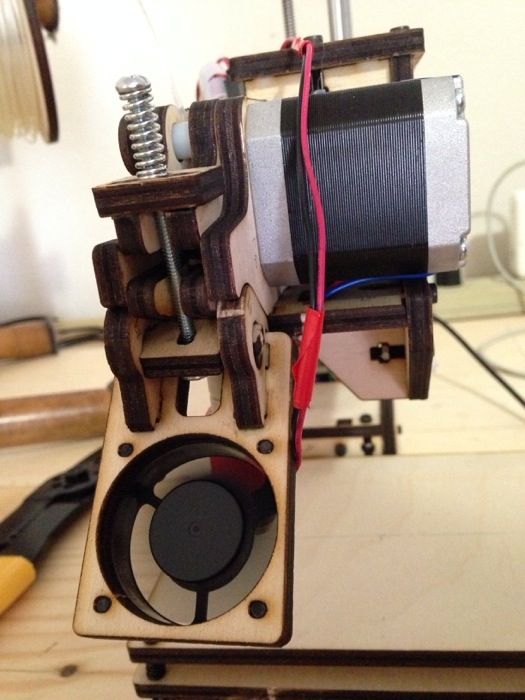
A Fan Fix
At some point the other day I peeled the sticker off the center of the cooling fan on my Printrbot extruder. I think in so doing I must have budged the solder where the wires enter the fan: last night I realized the fan wasn’t running, regardless of setting. So, this morning I pulled my multimeter out of cold storage (no, really – it is cold in the garage) and verified current was reaching the fan. I was happy to confirm the fan was at fault, and not some connection on the circuit board.
A quick trip to Unicorn Electronics for an identical replacement, and we’re back in action!
The cooling fan helps ensure plastic emerging from the extruder solidifies quickly. Actually, as a test I printed several items earlier this week with it turned off, and didn’t notice a difference in output – perhaps it is more important when the ambient temperature is higher.
Posted on Thursday, January 23rd, 2014.
Building OpenSCAD from Source
OpenSCAD is a useful tool for 3D modeling. You create models in OpenSCAD by writing scripts composed of commands like cube or rotate to instantiate and manipulate shapes. Furthermore, you can combine shapes using constructive solid geometry operations like union or difference. So it is not a substitute for interactive modeling, but a tool for writing programs to generate models from input. For example, Thingiverse Customizer uses OpenSCAD.

I use OpenSCAD with Linux Mint, where it is readily available via the Software Manager. However, the version available there is not the latest. Furthermore, the downloadable version of the latest release on the OpenSCAD web site does not run on my laptop, due to an unnecessarily strict glibc version dependency. So, rather than muck around with a bunch of different versions, I decided to just build the latest code available from Github. Happily, the build instructions work. Here’s a step-by-step summary for Linux (assumes you have git installed):
# download the code
git clone https://github.com/openscad/openscad.git

# enter the downloaded directory
cd openscad

# download MCAD part library, stored as a separate repository
git submodule update --init

# download and compile other dependencies (tools and libraries)
# - might take a while depending how many are already installed
scripts/uni-get-dependencies.sh
scripts/uni-build-dependencies.sh

# compile Openscad
qmake
make
Now you can run openscad from that directory, or run sudo make install to install the app for systemwide access.
Posted on Wednesday, January 22nd, 2014.