Tag Archive: “mac”
Safari, NetNewsWire, Yojimbo, and Pinboard
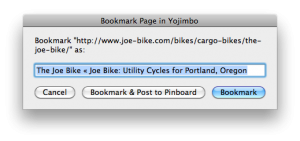
Bookmark Page in Yojimbo
This is a script for Safari. It’s a variation on my Bookmark in Yojimbo script. The original “Bookmark & Edit” option has been replaced with “Bookmark & Post to Pinboard”. I rarely want to edit a bookmark or its properties, but soon I might start sharing some links on Pinboard.
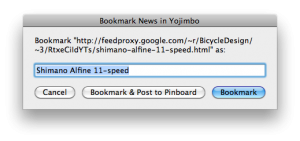
Bookmark News in Yojimbo
This is a script for NetNewsWire, a free feed reader for Mac OS X. It works just like the above script for Safari. It saves a bookmark to the current news item, and provides an option to spread the news by posting the bookmark to Pinboard. This is what I’m going to do instead of sharing items in Google Reader.
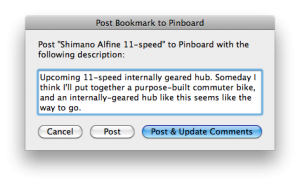
Post Bookmark to Pinboard
This is a script for Yojimbo, the program I use to save bookmarks and other bits of information. It posts the selected bookmark items to Pinboard. This script is invoked [and thus required] by the “Bookmark & Post to Pinboard” option in both scripts listed above.
Before posting a bookmark, the script prompts you to enter a description. The initial value of the description is based on the Yojimbo item comments. If you click “Post”, the bookmark will be posted with the given description but the Yojimbo item comments will not be changed; “Post & Update Comments” will change the item comments to match the entered description.
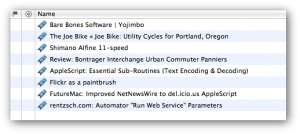
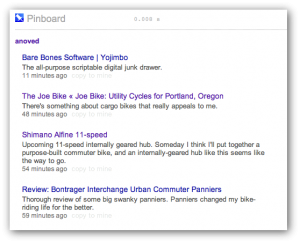
To help you keep track of what you’ve shared, items posted to Pinboard are added to a “Pinboard” collection, which will be created if it doesn’t already exist. As an example, here’s what my collection looks like at the moment:
And here’s how it looks on Pinboard:
Limitations
These scripts don’t deal with tags, labels, stars, or other features offered by Yojimbo or Pinboard. These scripts aren’t likely to be very useful if you’re not me. I don’t know exactly what happens if you post the same bookmark to Pinboard twice; I think it’s updated automatically.
There are bugs.
Download
Download all three scripts here (24 KB)
Configuration
Some assembly is required. I recommend installing the scripts in the following locations (create the directories if they don’t already exist). Run them with FastScripts or the regular script menu.
~/Library/Scripts/Applications/Safari/Bookmark Page in Yojimbo.scpt
~/Library/Scripts/Applications/NetNewsWire/Bookmark News in Yojimbo.scpt
~/Library/Scripts/Applications/Yojimbo/Post Bookmark to Pinboard.scpt
Edit the _pinboard_script_path property at the top of both “Bookmark in Yojimbo” scripts to identify the full path to your copy of the Pinboard script. In my case, this reads:
property _pinboard_script_path : "/Users/anoved/Library/Scripts/Applications/Yojimbo/Post Bookmark to Pinboard.scpt"
Lastly, edit the _API_username and _API_password properties at the top of the Pinboard script to reflect your Pinboard login information. Since the Pinboard API is essentially a clone of the Delicious API, it should be straightforward to modify this script to work with Delicious – but unfortunately I haven’t quite got it working. Don’t hold your breath for an update, but please do share any fixes or improvements.
Acknowledgements
The code to post to Pinboard is derived from this NetNewsWire to Delicious script by Larry and Andrew. My sketchy URL encoding code is lifted from this example at Mac OS X Automation.
Posted on Monday, February 15th, 2010. Tags: applescript, mac, netnewswire, pinboard, safari, yojimbo.
Kitgen Build System for Tcl/Tk
In the past I have written a variety of posts about Starkits and Starpacks. Briefly, Starkits provide a way to package complex Tcl/Tk programs in a single file, and Starpacks allow those packages to be combined with self-contained interpreters to deliver stand-alone applications. However, the Tclkit interpreters I originally used for this purpose have not generally been maintained, at least for Mac OS X (Pat Thoyts has done a good job providing current Windows and Linux versions).
Of course, there are various ways to build your own Tclkit equivalent, but I usually found the process slightly too tedious to sustain my interest (although I did succeed with Pat’s version of kitgen shortly before discovering the method described below).
As it turns out, self-contained Tcl/Tk installations functionally equivalent to Tclkits can quite easily be created with the kitgen build system. This comprises a single Tcl script (kbs.tcl) that automates the process of downloading, compiling, and assembling the elements of a “kbskit”. The script is robust – it worked successfully on the first try, without any knowledge of what options to use beyond those given in the Quick Start examples.
If you simply run a fresh copy of kbs.tcl, it will retrieve the Tcl/Tk sources.
Build a Metakit-based kbskit (like Tclkit) with:
./kbs.tcl -r -mk install kbskit8.5
Build a Vlerq-based kbskit (like Tclkit Lite) with:
./kbs.tcl -r -vq install kbskit8.5
In either case, three executables will actually be built:
- A Tcl-only executable, denoted by
-clisuffix - An executable that loads Tk from an external library if needed, denoted by
-dynsuffix - An all-in-one Tcl/Tk executable, denoted by
-gui
On Mac OS X, these executables are found in the buildDarwin subdirectory relative to kbs.tcl. The subdirectory name will presumably differ on other operating systems.
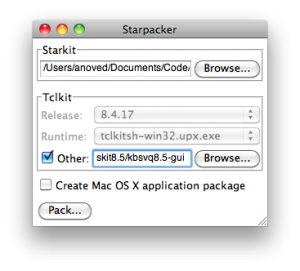
Happily, the kbskits created with the kitgen build system can be used with Starpacker. Check the “Other” box and select the kbskit you prefer to use as the executable in your Starpack:
You can bundle other packages into your kbskits using the -mk-bi or -vq-bi options (-bi stands for “Batteries Included”). This will ensure that those packages (typically useful extensions) are always available to code being run by that kit. Of course, a different approach, with different advantages and disadvantages, is to bundle packages in your application Starkit, which can be executed with different kits.
Additional topics to explore include building the --enable-aqua option and the best method to update both kbs.tcl and the source code it retrieves.
Posted on Sunday, January 10th, 2010. Tags: code, mac, tcl.
yjnote
yjnote is a Mac OS X command-line tool for creating note items in Yojimbo. You can use it to pipe the output or usage notes of other programs into Yojimbo for reference or logging purposes.
Download
Download yjnote.zip (1.7 KB)
Tested, minimally, with Yojimbo 2.1 on Mac OS X 10.6.2. yjnote is written in Perl with a pinch of AppleScript. Further testing, bug fixes, and improvements are welcome (and likely necessary).
Usage
You can display this documentation at any time with yjnote -help.
NAME
       yjnote − Create Yojimbo notes from the command line.

SYNOPSIS
         yjnote [options] [FILE...]

DESCRIPTION
       yjnote creates a Yojimbo note by concatenating the contents of the
       given files (or by reading standard input, if no files are given).

OPTIONS
       −title TEXT
           Sets the note item title.

       −comments TEXT
           Sets the note item comments.

       −label TEXT
           Sets the note item label. Ignored if the label does not exist.

       −tags TAG[,TAG,...]
           Sets the note item tags. Separate tags with commas.

       −flagged
           Flags the note item.

       −reveal
           Reveals the newly created note in Yojimbo. By default, the new note
           is not displayed.
Posted on Sunday, December 13th, 2009. Tags: applescript, mac, perl, yojimbo.
LSynth 3.1 for Mac OS X
I have compiled a Mac OS X version of LSynth 3.1, the recently released update to the program that synthesizes LDraw code for flexible LEGO parts.
Download LSynth 3.1 for Mac OS X 10.5+ (Universal Binary; 85 KB)
This download includes the lsynthcp executable as well as the configuration file (.zip) and the constraint parts (.zip) available at Willy Tschager’s installation tutorial page for MLCad users (which contains some useful information for all LSynth users).
Important Compatibility Note: The executable in the above download may only work with Mac OS X 10.5 (Leopard) or greater. Click here to download a version of lsynthcp that should also be compatible with Mac OS X 10.4 (Tiger), provided by current LSynth developer Don Heyse. Thanks, Don!
Installation
Copy the LSynth constraint parts to the parts/ or Unofficial/parts/ directory of your LDraw part library. Keep the lsynth.mpd configuration file in the same directory as the lsynthcp executable. LSynth is not integrated with Bricksmith, so you can keep these files wherever you prefer. You will need to use the command line to run LSynth.
Usage
To use LSynth, you manually place constraint parts at key locations such as the endpoints of a hose. Then you input the LDraw file to lsynthcp, which generates a duplicate file containing all the hose segments, chain links, etc. necessary to represent the flexible part described by the constraints.
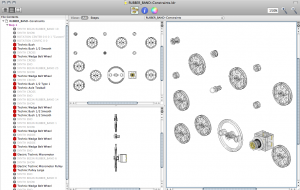
For example, here is the RUBBER_BAND-Constraints.ldr file from Willy’s excellent page of LSynth examples:
With the file in same directory as lsynthcp and lsynth.mpd, run the following command:
./lsynthcp RUBBER_BAND-Constraints.ldr Rubber_band_output.ldr
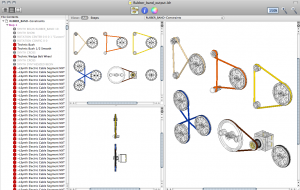
Here is the output:
For more detailed information about using LSynth, peruse Willy’s troubleshooting page and the pages linked above.
Notes
Here are the minor modifications I made to compile the LSynth 3.1 source package for Mac OS X:
- Edit the comment on Line 69 of
lsynthcp.cto begin with slashes (//) instead of backslashes (\\). - Append “
-arch i386 -arch ppc” to lines 3 and 17 ofmakefileto enable Universal Binary support.
The make command is sufficient to compile the program.
This release supersedes the LSynth Service I made a few years ago.
Posted on Saturday, November 21st, 2009. Tags: bricksmith, LDraw, LEGO, mac.
Using QuickCursor with TextWrangler
Via Michael Tsai’s blog: QuickCursor is a new utility that let’s you use the text editor of your choice to edit text fields you encounter in any program. It supports BBEdit by default, but it’s not too hard to add support for BBEdit’s little brother TextWrangler. Here’s how:
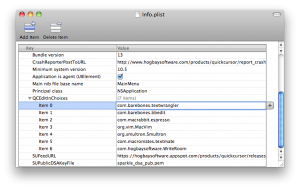
Open QuickCursor.app/Contents/Frameworks/Info.plist with Property List Editor, display the QCEditInChoices array, and click Add Child. Enter com.barebones.textwrangler and save the file.
Now you can use TextWrangler almost anywhere.
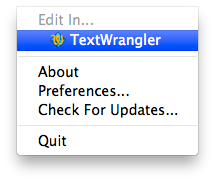
Of course, it’s not too hard to cut and paste text to and from another editor. This is most useful if you define a shortcut key to open the current text field in your favorite editor.
Posted on Monday, October 5th, 2009. Tags: mac, textwrangler.
FileMaker Pro 10 Rulers
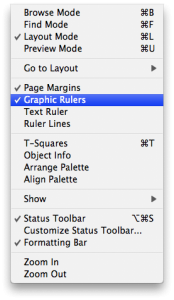
A quick tip for FileMaker Pro 10 users: in Layout mode, you can choose to display Graphic Rulers from the View menu:
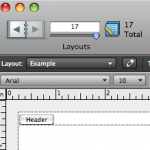
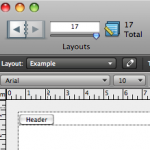
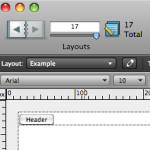
What you may not realize is that you can easily toggle between ruler units by clicking the unit label that appears in the upper left corner of the rulers. Unit options include in (inches), cm (centimeters), and px (pixels):
You can also toggle units by clicking the unit labels in the Info palette:

Posted on Wednesday, September 2nd, 2009. Tags: filemaker, mac.
Bookmark in Yojimbo compatible with Yojimbo 2.0
The current version of my Bookmark in Yojimbo script is compatible with the recently-released Yojimbo 2.0.
Posted on Wednesday, September 2nd, 2009. Tags: applescript, mac, safari, yojimbo.
Expanded Comments Fields for Yojimbo 2.0
Bare Bones Software has released Yojimbo 2.0, which I heartily recommend. However, Yojimbo 2.0 still comes out of the box with fixed-height comment fields. Here is an updated version of my hack to display comment fields that expand to fill the available space:
Download Expanded Comments Fields for Yojimbo 2.0 (32k)
Posted on Wednesday, September 2nd, 2009. Tags: mac, yojimbo.
Unofficial build of LDView 4.1 (with 3DS export)
My introductory guide to LDraw Augmented Reality relies on LDView’s 3DS export feature, which is currently present only in unreleased development versions of LDView.
Here is an unofficial Macintosh build of LDView 4.1 (code retrieved from Sourceforge on 31 August 2009). It includes 3DS export. Hopefully this helps a few more people get started with LDraw and SSTT Visualizer.
Download LDView-Unofficial.zip (Intel Mac OS X only) 1MB
Update: A formal beta version of LDView 4.1 has been released.
Posted on Monday, August 31st, 2009. Tags: ar, LDraw, ldview, LEGO, mac.
Logging in to the BU VPN
BU offers a virtual private network that allows users to connect to the campus network (and to the internet through the campus network) from at home or around the world. Reasons to do this include accessing files on the office computer or retrieving articles from journal sites that restrict access to subscribing institutions.
Here’s how to set up this sort of connection on your Mac. (I understand the procedure is very similar in Windows.) Go to ssl.binghamton.edu and log in using your standard username and password. Select the PODS domain unless you’re certain another option is appropriate for your account.
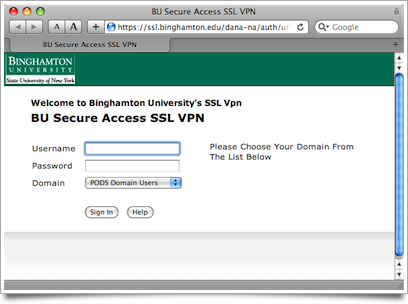
Signing in to ssl.binghamton.edu. Select the PODS domain.
You can access a variety of accounts and services directly through this web page, but to channel all of your computer’s network traffic through the campus network, click the Network Connect Start button.
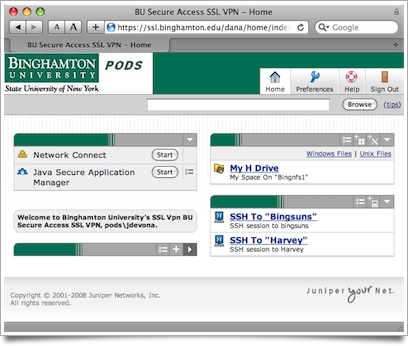
Signed in. Click the Start button next to Network Connect.
The Network Connect utility is installed automatically. You may be prompted to allow this bit of black magic.
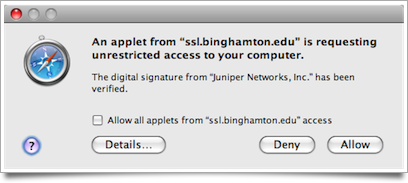
Allow Java to get up in your stuff.
It may take a moment for the program to download.
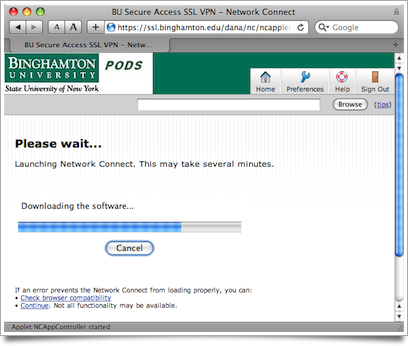
Wait for the connection utility to download and install.
Soon the Network Connect utility will run. Now you are connected to the campus network! You can access shared folders or servers hosted on individual machines invisible to the outside world.
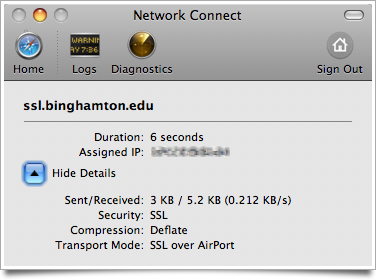
Connected!
Logging in to ssl.binghamton.edu is necessary only to install the Network Connect utility. From now on, you can connect to the VPN by running the utility directly. (It will prompt you for the same login credentials.)
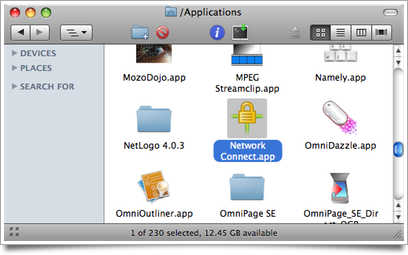
From now on, connect just by launching Network Connect.
Questions? Corrections? Related ideas?
Posted on Wednesday, June 24th, 2009. Tags: mac.
