Tag Archive: “bike”
Pannier Shoulder Bag
With a pair of cheap carabiners and a strap scavenged from an old duffel bag, you can comfortably carry a bike pannier over your shoulder. Pass the pannier’s handle strap through the carabiners to prevent the bag from dropping if the carabiners are jostled off the rack hooks. (I find this isn’t much of an issue, but parkour commuters may want something more secure.)

When it’s time to mount the bag on your bike rack, slip the carabiners off the hooks and loop the shoulder strap under the cover flap to keep it clear of your wheel. This setup is specific to the panniers I’ve got, of course, but I’m sure you can work out something similar with any model.

Do the hooks or rigid irregularities on the back of the pannier make it uncomfortable to carry? No; unlike a backpack, a shoulder bag hangs pretty loose, so nothing digs into your back or side. Of course, this is just intended as a convenience, so if you’re concerned with ergonomics you should look for a pack expressly designed for the purpose.
Posted on Thursday, March 11th, 2010. Tags: bike.
New Old Bike
Got a bargain on a vintage 3-speed Schwinn today. It’s a 1968 “Racer”, made in Chicago.

Needs new tubes and brake pads, but otherwise it seems pretty solid. It’s the perfect practical configuration for doing errands around town: fenders and chainguard to stay clean, a rack to carry things (although it may need a little tweaking to fit my favorite panniers), and an internally geared hub. The cushy seat and relaxed posture are nice, too.
The internally geared hub is an intriguing novelty to me. It works, but behaves very differently from the derailleurs I’m accustomed to.
Posted on Tuesday, March 9th, 2010. Tags: bike.
Making a Studded Bike Tire
Inspired by a tutorial discovered via BikeHacks, I decided to make a studded bike tire to facilitate pedal-powered winter adventure.
I started with an old spare tire, and six 98¢ bags of screws:

Then I sat down and drove all 84 of those puppies into the tire:
I opted to stick with the points-in approach rather than the less labor-intensive points-out approach. I used a bench grinder to blunt the points of the screws:
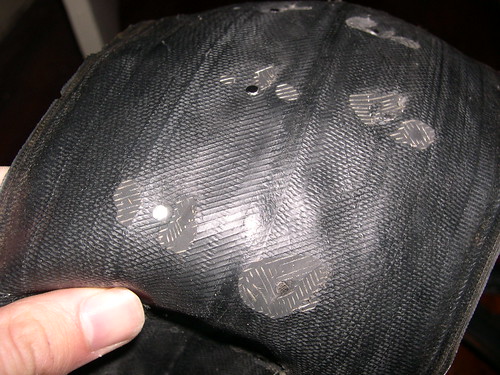
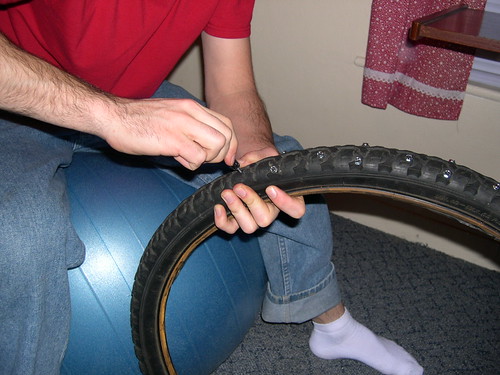
Even without points, the screws constitute a threat to the inner tube. Mr. Tuffy liners are recommended for the purpose of extra puncture protection, but I’m trying a cheaper approach – a second layer made of scavenged inner tube:
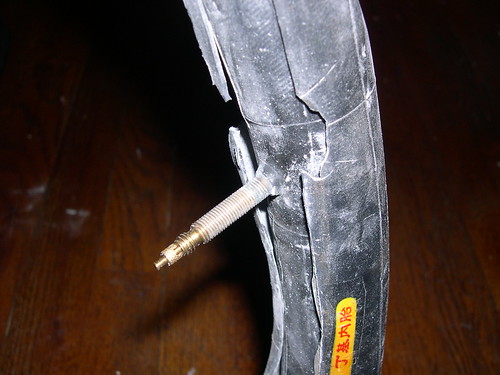
I installed the tubes in the tire and mounted it on a rim. As I only have one studded tire, I’m using it in the front. I conjecture that steering is more important than acceleration in preventing icy wipe-outs.
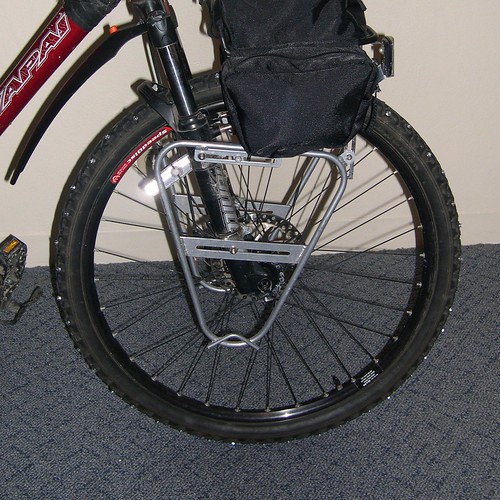
It works! On hard pavement, the studded tire rolls with a prickly sound like tearing fabric. I’ll post some some winter action shots soon.
Posted on Monday, December 21st, 2009. Tags: bike.
Transportation Alternatives
A post at The World Awheel suggests we should compare bicycles to the foot rather than the car. From that perspective, the around-town advantages seem unambiguous. The ability to travel faster than you can by walking, combined with the ability to navigate beyond the domain of public transit, is a great ability indeed — especially if the operating costs are next to nothing.
In fact, there are a lot of people, most of them hidden from those of us in a comfortably middle-class position, who are not a part of America’s car culture because they simply can’t own a car. These are the people we need to get on bicycles, because for them, for all intents and purposes, it’s still 1881.
There is more to solving transportation problems than providing an affordable vehicle for everyone, of course. Transportation needs are irrevocably related to the structure of our society. Where do you go, how do you get there, and what are the costs?
Posted on Wednesday, September 2nd, 2009. Tags: bike, car.
Kickstands and Racks
You can use a scrap of rubber from an old bike tire inner tube to improvise a no-slip/no-scuff tip for your kick stand.
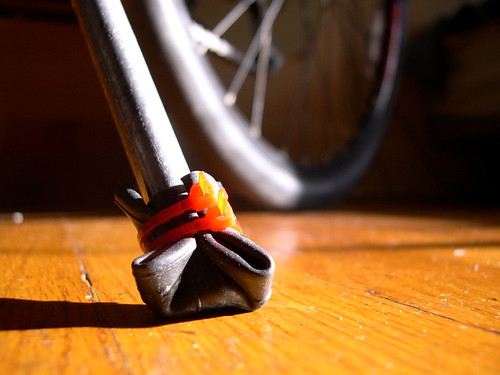
I folded a wad of inner tube over the end of my kickstand and zip-tied it in place. This makes it safe to park on surfaces such as your bedroom’s beautiful hardwood floor.
I was partly inspired by an Instructable article that describes many uses for old inner tubes. Since I recently decommissioned a tube, I’ve got some material to play with.
In other news, I recently completed installation and reinforcement of a set of front racks, thus greatly increasing my expeditionary cargo capacity.
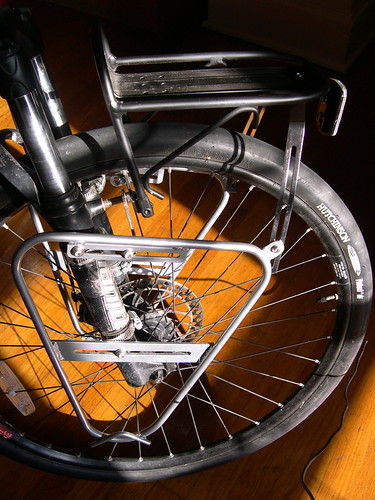
The side racks are Delta Shock Treatment racks – contrary to the description, they do work with disc brakes. The kit comes with two kinds of mounting hardware – I used the hose clamp approach, which affords enough flexibility in positioning to avoid conflict with other components. (Note the Nashbar version of the kit does not include the “optional cross brace”.)
The front rack is Nashbar’s aptly-named Front Rack. It requires additional reinforcement, in part because it pivots at the brake boss mounts. The default support is intended to connect to the center of the fork, but it wasn’t compatible with my fork, so I ended up adding struts to the side racks. This configuration is sturdy and stable.
These front racks are compatible with my detachable baskets. I haven’t ridden around with the baskets on front, as I suspect they might interfere with steering more than other loads, but it’s nice to know I’ve got four hardpoints if I need them!
Posted on Monday, July 27th, 2009. Tags: bike.
Doing It Right
Inspired by a post on Beany’s blog (one of many neat bicycle sites I’ve discovered recently), I spent some time this evening cleaning my chain:

Freshly cleaned chain. Before cleaning it was black with grime!
A few days ago I tried cleaning the chain while it was on the bike, but it wasn’t very effective. So, tonight I took the chain off the bike, put it in a tub (which may or may not have been my bath tub) with a strong mix of water and degreaser, and scrubbed it thoroughly with an old toothbrush. Rinsed, dried, and lightly lubricated; now it’s back on the bike and ready for action!
General principle: if you rely on it regularly, it’s worth maintaining properly.
Posted on Wednesday, June 24th, 2009. Tags: bike.
Detachable Baskets
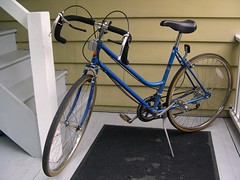
I rolled this old step-through bike pretty frequently over the past year. With the addition of a simple Nashbar rack and some cheap baskets, it made a great grocery-getter.

Baskets on the old blue bike.
I attached the baskets to the rack with a battery of zip ties. Many ties along the top distributed the weight of the load. One or two ties at the bottom of the baskets kept their frames held snugly against the rack supports.

Baskets attached to bike rack with zip ties.
I gave the blue bike to my sister, but I kept the baskets. They’re handy, but admittedly a bit cumbersome to ride around with all the time (although at the rate I accessorize my bike, you wouldn’t think it’d matter). So, inspired by an Instructable about backpack panniers, I devised a simple 24″ bungee cord detachable basket mounting system.

Basket adapted to attach with bungee cord. Detachable!
The basket’s weight is supported by the base of the hooks. The bungee cord is kept taut by looping it under the tabs found at the base of most racks, and the basket is again stabilized by strategically placed zip ties. Hot swappable bicycle luggage!
Posted on Thursday, June 18th, 2009. Tags: bike.
Mis Bicicletas
I bought an old road bike for $9 last week. I’ve enjoyed tuning it up and thinking of new missions for it and my other bike.
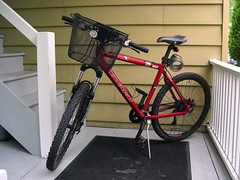
The basket on the red bike is neat because it can be unclipped and carried around like a regular shopping basket. Quite practical! I’ll upload more pictures to my bikes set as the fleet evolves. I expect a rack and further repairs may be in store for the blue bike.
Posted on Thursday, June 19th, 2008. Tags: bike.