3D Printing Projects
If you’ve been following my recent posts here and elsewhere, you’ve probably noticed a recurring theme: 3D printing. The immediate source of this new interest is the Makerbot my dad is hosting at school, thanks to the forward-thinking investment of DCMO BOCES. Read more about 3D printing in the library and other related topics at my dad’s blog.
The plastic objects produced by today’s 3D printers aren’t really anything new, but the ability to make them at home in an afternoon certainly is.
No retooling is necessary to create different objects with additive manufacturing. This removes a barrier to the creative experimentation and iteration that is a vital part of craftsmanship. Plastic has unique properties, but unlike materials such as wood and metal, which were worked by hand for generations before the advent of mass production, plastic has never been an artisan medium. The plastic objects produced by today’s 3D printers aren’t really anything new, but the ability to make them at home in an afternoon certainly is. So, I think there is a potent sense of empowerment driving interest in this technology.
For similar precedent, see how the proliferation of affordable computing power has transformed our access to information, if not society itself. 3D printing has already enabled individual artists, engineers, and entrepreneurs to realize their ideas. I am curious what influence it could have on [mass-produced, disposable] material culture at large.
Parts
More immediately, I see 3D printing as an opportunity to make better use of the things I already have. In particular, I saw it as way to reuse or repair the many bike accessesories I’ve accumulated, which sometimes end up unused due to misfit or MIA mounting hardware. A custom-printed bracket fits more securely than zip ties and duct tape but is more affordable than a factory-ordered replacement, if one is even available.
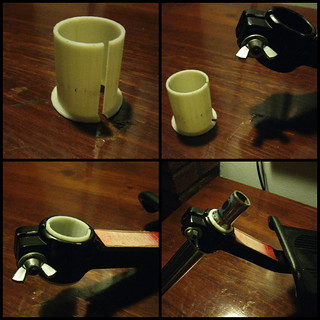
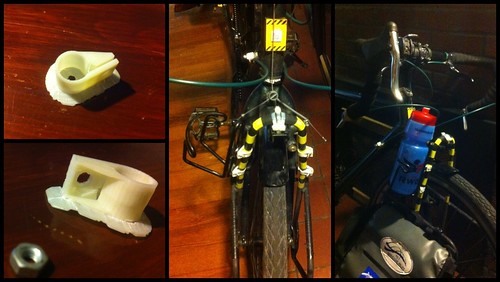
This shim adapts the clamp of a spare beam rack to the smaller diameter seatpost of my old folding bike:
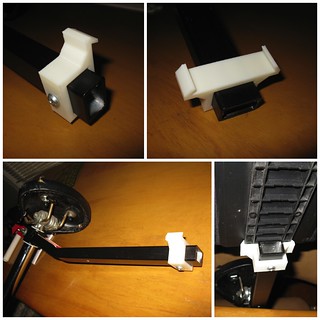
This piece is part of a set intended to let my trunk bag attach to the same beam rack. The bag has a plastic rail on the bottom which slots into grooves in compatible racks. I’ve not quite perfected the rail fit yet.
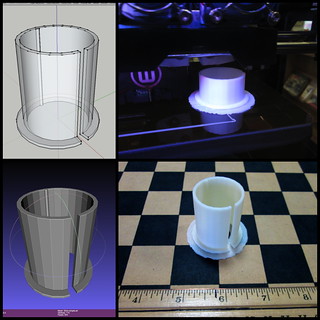
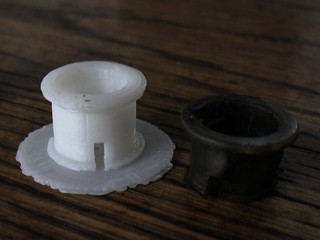
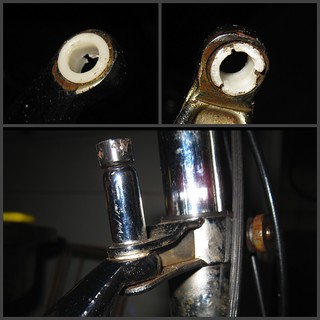
This small sleeve replaces the folding bike’s original steering joint sleeve. It’s a tough act to follow, as the sleeve must be snug enough to prevent play (disconcerting at speed!) but loose enough to let the pin be inserted or removed with ease to facilitate folding. We printed a couple versions to experiment with different infill (density) settings.
With three water bottle cages, my bike already has more fluid capacity than most. That’s no reason not to add hardpoints for two more, though. These little clamps fit the tubing from which my bike’s front and rear racks are built, and can be installed in pairs to provide bolt points for water bottle cages (or other gadgets, I suppose) wherever there is room. Partly an experiment in designing surfaces thin enough to take advantage of plastic’s flexibility for snap-on installation.
Programs
I’ve also been writing some little programs to help generate printable objects.
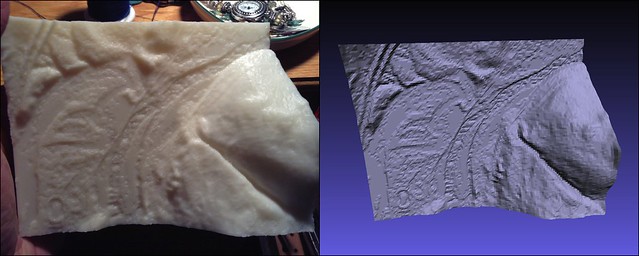
Previously introduced here, hmstl makes printable landscape models – geographic manipulatives – from heightmap images. (The name is a cryptic abbreviation for “Heightmap to STL”, STL being a common 3D file format suitable for printing.) Here’s a picture of the printed output next to the hmstl model:
The program optionally accepts a “mask” image; masked areas are not included in the output. This can be used to generate models of non-rectangular areas. Here’s an arbitrary example using an oval mask:
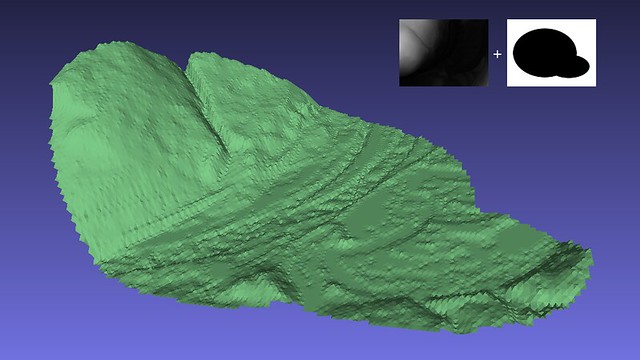
Here’s a more meaningful example. The heightmap represents the elevation of the area around Binghamton, NY, while a mask image was used to cut out a model of the actual city limits:
Another program is ridge-o-gram, introduced here, which produces “lenticular” models from black and white image pairs. The pixels of each image are presented as the left and right faces of a series of ridges, so that one image is seen when you view the object from the left and the other from the right. Intended to take advantage of the Makerbot 2x’s dual extruders by printing the “black” and “white” image components as interlocking perforated layers. Haven’t quite managed a successful print yet, in part because the output is pretty complex and perhaps near the limit’s of the Makerbot’s resolution, at least for non-tiny images.
Under the hood, hmstl and ridge-o-gram both use libtrix, a crude C library I wrote to handle the repetive task of formatting triangle coordinates for STL files output. It is crude in the sense that it does nothing to enforce valid geometry – it’s just the simplest possible shortcut for reading and writing STL files, so it trusts the application to generate printable shapes. A fun exercise in reinventing the wheel, though.
Naturally, I’ve got a bunch of ideas for other parts and programs, including friendlier web-based ways to use the programs, but we’ll save that for later.
Posted on Monday, December 9th, 2013. Tags: 3d.
