My Printrbot
Earlier this month I ordered a Printrbot Simple. The kit arrived last Thursday. I stayed up late to assemble it and had a lot of fun in the process – I marvel at the way such a sophisticated class of machine can be built from relatively simple parts. See the photo captions in the slideshow above for comments on particular steps.
Me being me, I can almost claim the kit was worthwhile for the satisfaction of assembly alone. But it works, too! It works very well – better than I expected, to be honest.
I’ve printed a variety of models so far, including some of my own design and some from Thingiverse. Above, my prints of Matthew Croucher’s calibration cubes and Steven Morlock’s version of the bust of Nefertiti. Below, a bicycle taillight adapter I designed and an experiment in painting a landscape model of Binghamton prepared with hmstl.
Physically, I have found two adjustments are key to getting good results.
The first is common to all 3D printers: the bed must be level relative to the extruder; otherwise, the plastic won’t adhere reliably and you’ll get frustrated. Currently, levelling is accomplished by adjusting the spring-loaded screws at each corner of the bed to ensure an even gap between the extruder and the platform across the whole print bed. Thanks to the clever hackers at Printrbot, however, a system that compensates in software for bed orientation is evidently in the works.
Secondly, since the Printrbot Simple’s X/Y motion is driven through lengths of fishing line, it is important to keep these cords taut. My first few prints came out a bit sloppy, largely due to a bit of slack in the lines. I increased the tension and everything since has come out sharp. The cords are now almost tight enough to pluck like a guitar string.

I am using Repetier-Host to control the printer. It provides an interface for placing models on the print bed, converting models to printable instructions using the bundled Slic3r program, and monitoring the status of prints in progress. You can also use it to manually operate the printer’s mechanisms – useful for reloading filament or checking the bed level. The screenshot at right shows a print in progress; you can monitor a graph of the extruder temperature or a visualization of what’s been printed so far (not shown).
Desktop 3D printers build objects by extruding one layer of a model at a time. A slicing program’s job is to convert an arbitrary model into a stack of printable layers, or slices. Thus, the options set in Slic3r (or similar software) have a big impact on the outcome of the print.
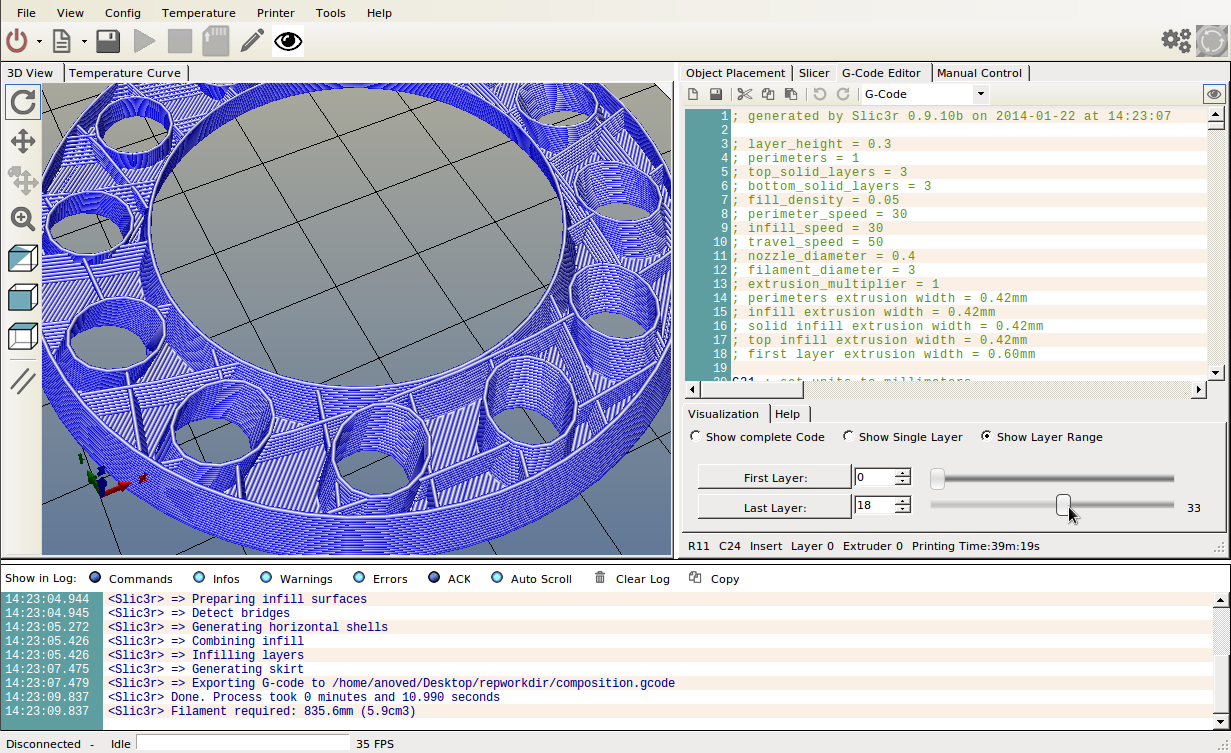
Important slicing options include layer height and infill – the density of the filler material, if any, to be laid down within the outline of each layer. Other key settings include the number of perimeter outlines to output for each layer and whether to generate supports for overhanging features – scaffolding to be removed when the print is done, as seen around the Nefertiti bust above. Last but not least, you can configure the speed at which the printer executes each type of task. I find that reducing speed helps reduce unwanted vibrations. At right, a screenshot of the slicing preview of this sweet pencil holder. You can see the internal grid that forms the 0.05 infill consumes little material but provides plenty of reinforcement.
I think a comparison to traditional photography is apt: a great part of the art lies in familiarity with the technology and process, which informs the photographer’s choice of lens, film, and exposure.
Choosing the most appropriate settings for each print is a balancing act between a number of factors: strength, material consumption, print speed, and fidelity to detail, to name a few. I think a comparison to traditional photography is apt: a great part of the art lies in familiarity with the technology and process, which informs the photographer’s choice of lens, film, and exposure.
In conclusion, I gladly recommend the Printrbot Simple to anyone interested in getting into 3D printing – not despite its simplicity, but because of it. It is easy to observe how it works, and thanks to its simple construction, not too intimidating to assemble or adjust. I’ve read a lot about 3D printing in the past few months, but I’ve learned a lot more in the past few days just from playing around with this printer.
Posted on Wednesday, January 22nd, 2014.